
A bedroom accent light can add color and definition without taking up space on the nightstand or wall.
LED Lights Bedroom Ideas range from a concealed glow behind a headboard to a strip under the bed, so the effect can highlight details you already have rather than compete with them.
The examples also show how to shape flexible lights into a loose wave, arrange panels as geometric wall art, or outline a dark ceiling with color.
Consider where the light will land and whether the source stays hidden from bed before choosing a look. Each detail can help set the mood while keeping practical lighting separate.
1. Give a Plain Wood Headboard a Colored Halo
Credits: Chevee Dodd
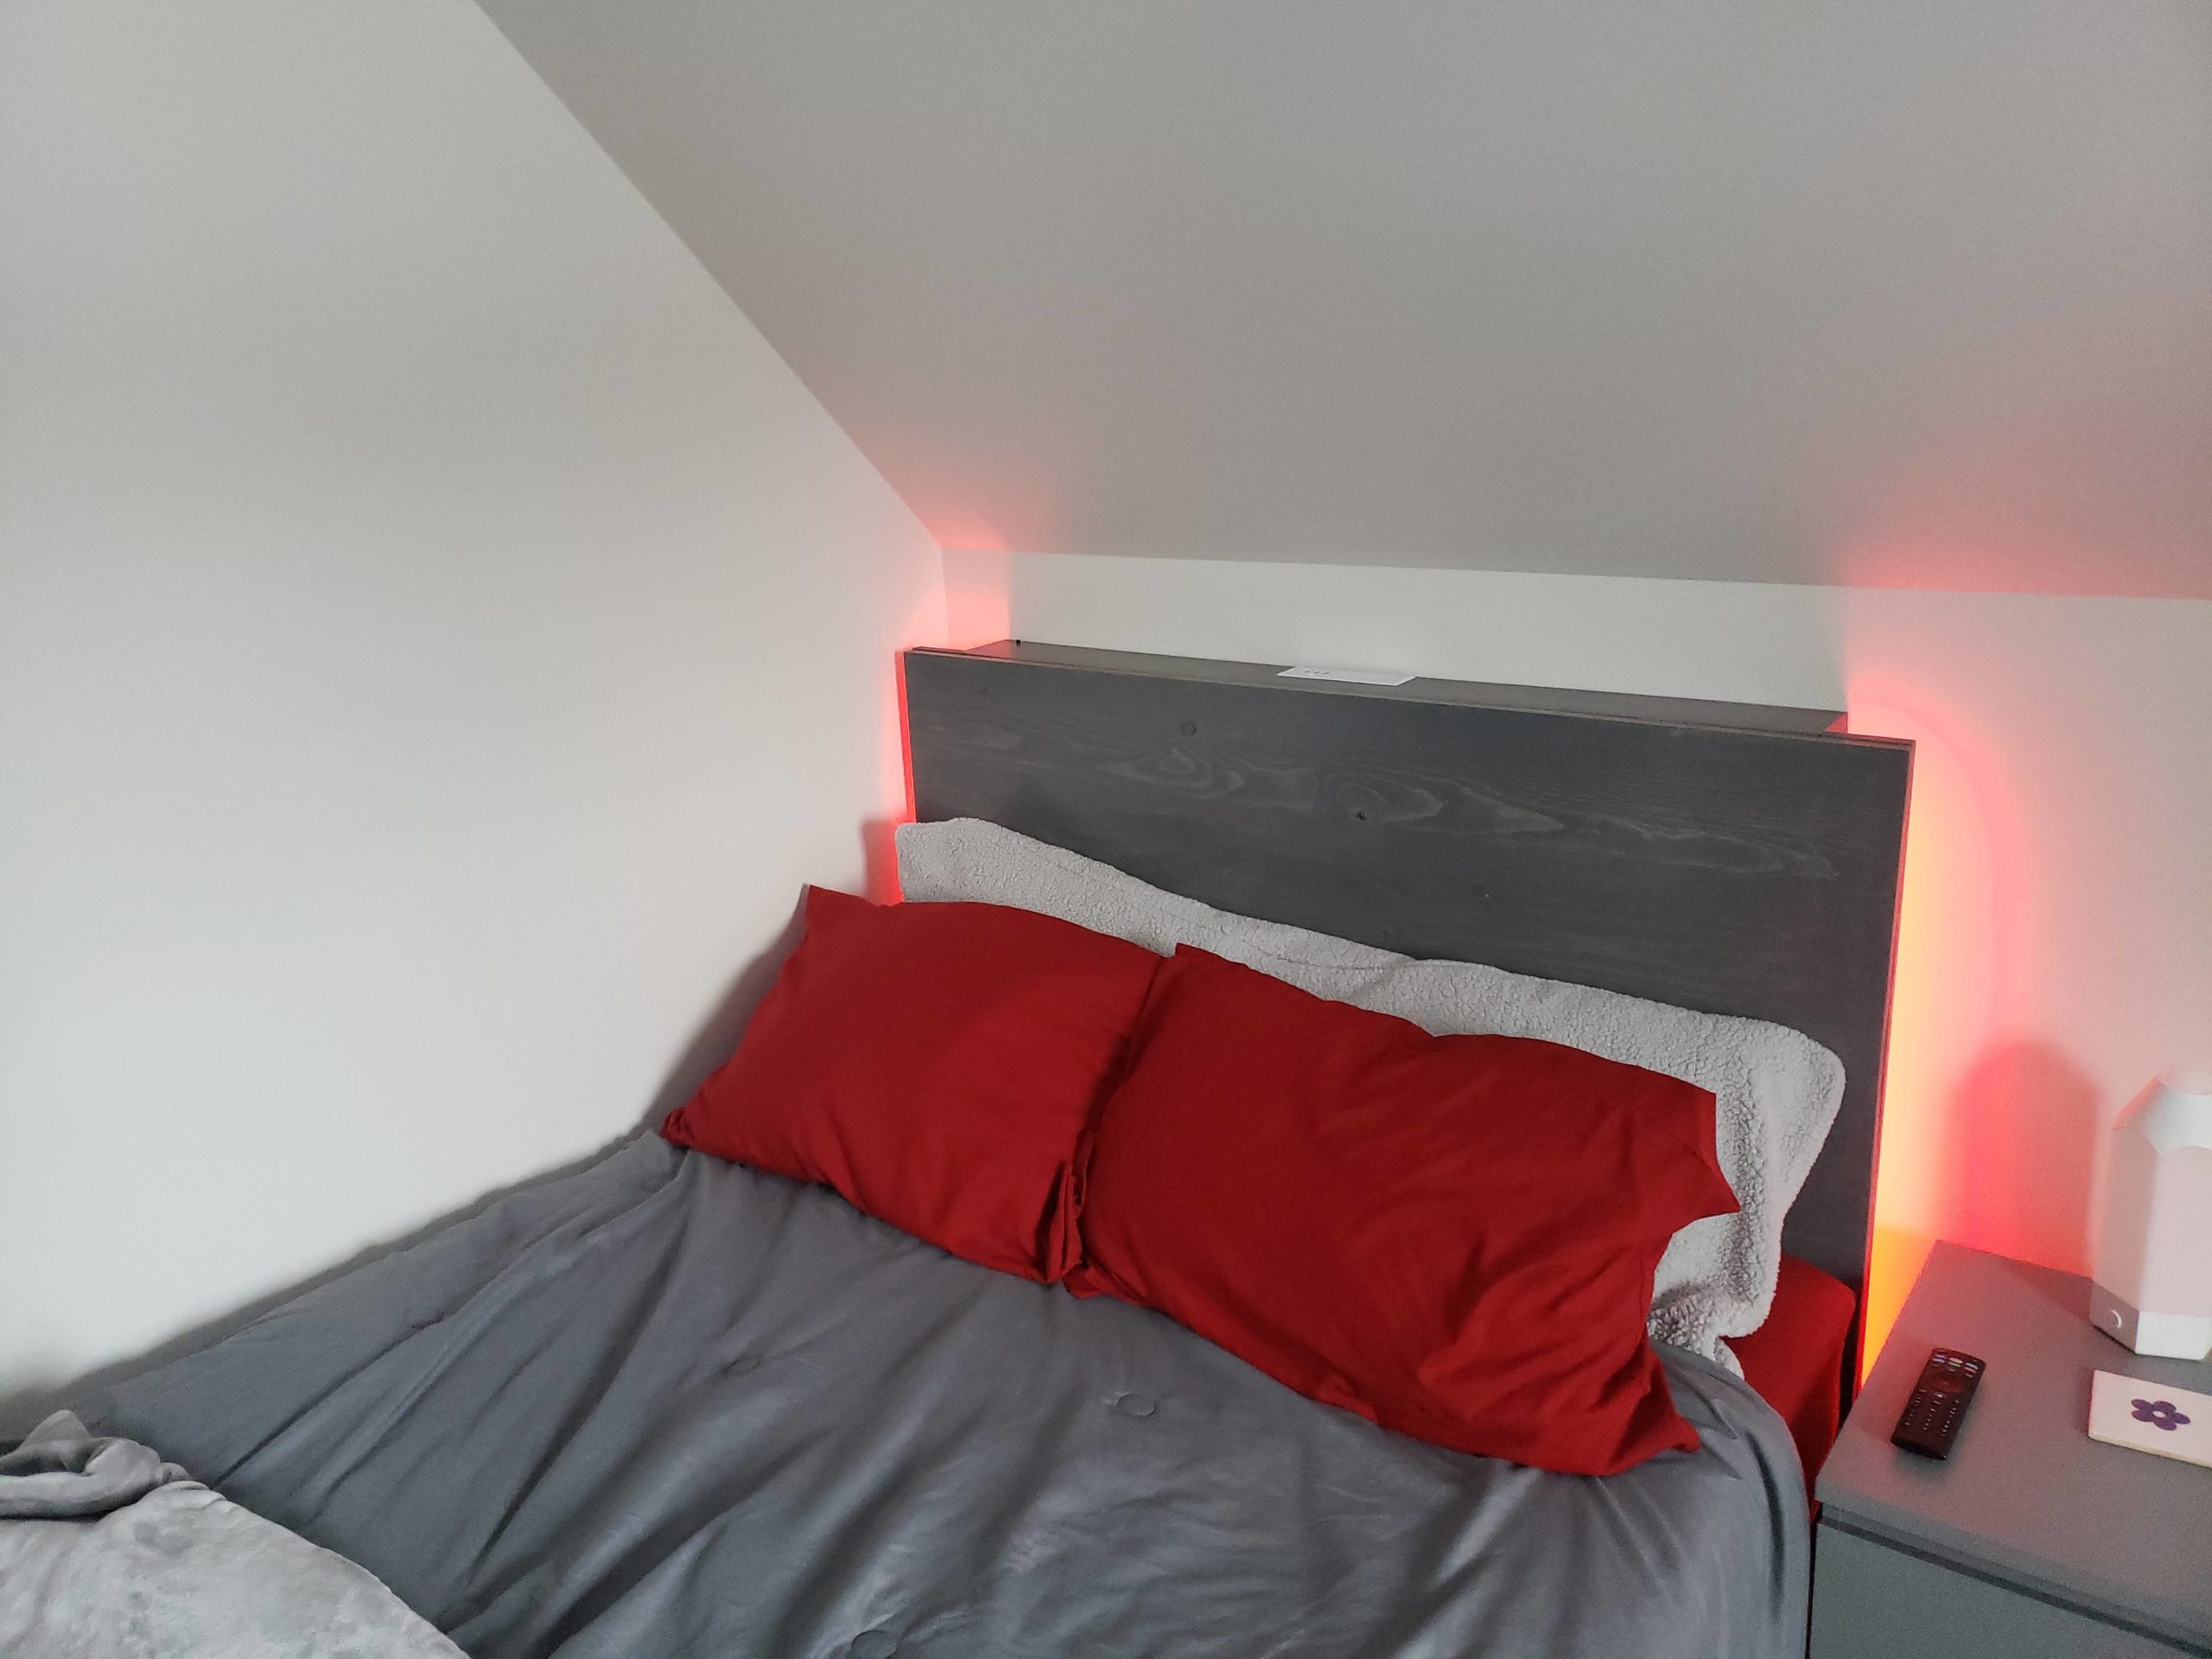
A simple wooden headboard becomes a lighting feature when LEDs shine from behind its edges. Here, coral light spills onto white walls while the dark panel and red pillows keep the effect connected to the bedding.
The narrow glow suits a bed tucked beneath a sloping ceiling because it adds interest without requiring a tall fixture. Start by looking at the space between your headboard and wall, then choose a compatible strip system with adjustable brightness.
Keep the light source concealed from your usual sitting position. A nearby remote makes changes convenient.
Test the color against your wall paint before settling on a setting, since the same strip can look different against warm white, gray, or a strongly colored surface.
2. Wash a Textured Wall Above an Upholstered Headboard
Credits: Ces Dimalanta / Manila Millennial
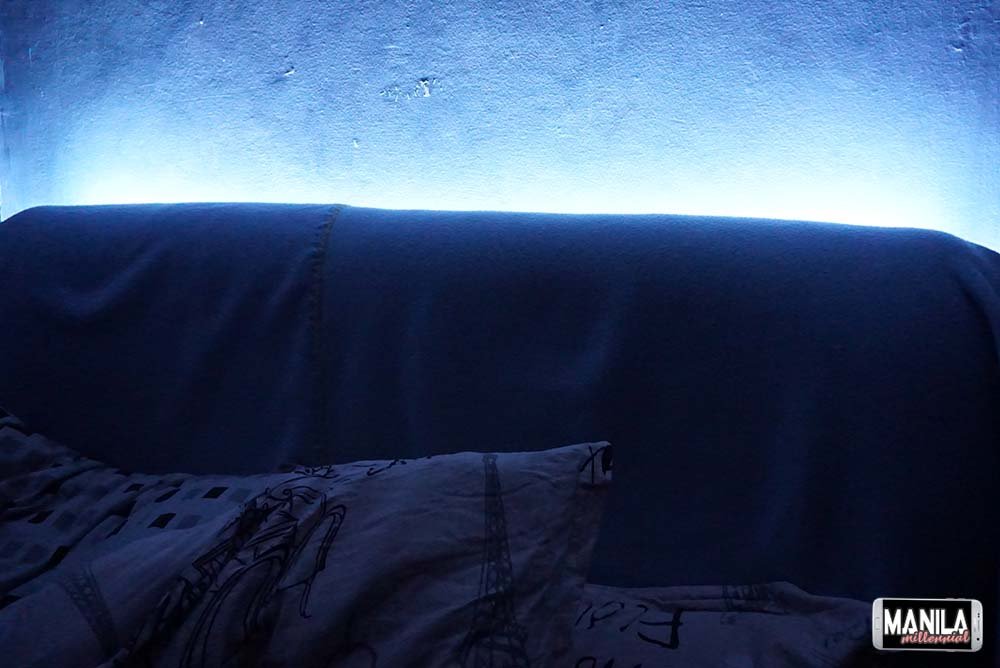
An uninterrupted band of blue light brings out the small ridges and irregularities in this bedroom wall. The upholstered headboard hides the strip itself, leaving the upper edge outlined while the pillows remain mostly in shadow.
This is a useful direction when the wall already has texture and does not need another decorative object. Try the effect with the strip temporarily positioned before committing to its final mounting method.
Check the view from both sides of the bed so bright diodes do not peek around the corners. Choose a dimmable system if you want more control over the atmosphere.
Keep this accent separate from your practical reading light, and switch it off when you want the bedroom dark for sleeping.
3. Build a Reading Strip Into Overhead Cabinetry
Credits: Michael Clifford / Modustrial Maker
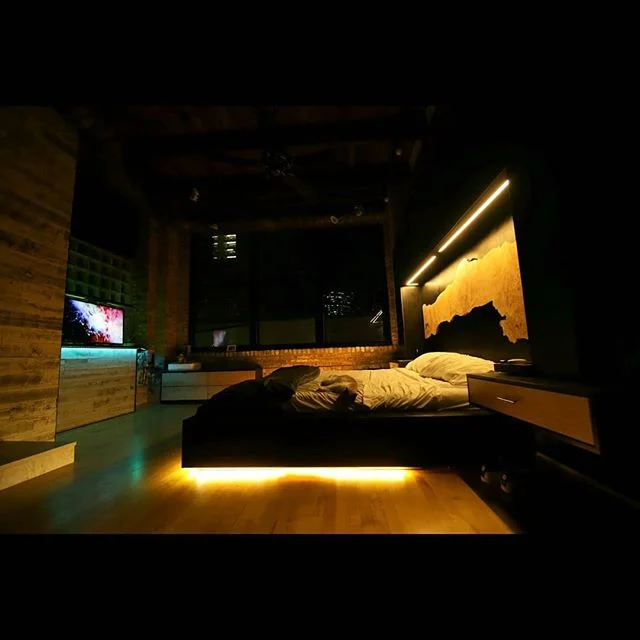
A slim illuminated line beneath the upper cabinetry draws attention to the live edge headboard in this bedroom. The light sits above the pillows, making the surrounding built-ins feel like a coordinated bed enclosure.
It is a particularly useful idea when cabinetry already occupies the wall behind the bed. Plan the light at the same time as the cabinet depth so the source can remain shielded from someone lying down.
A diffuser can help turn a row of LEDs into an even line. Give the reading light its own accessible control rather than tying every accent to one switch.
Here, the additional floor glow creates a separate lower layer, while the upper strip emphasizes wood grain and the headboard's outline.
4. Trace the Floor Around a Platform Bed
Credits: end2end zone
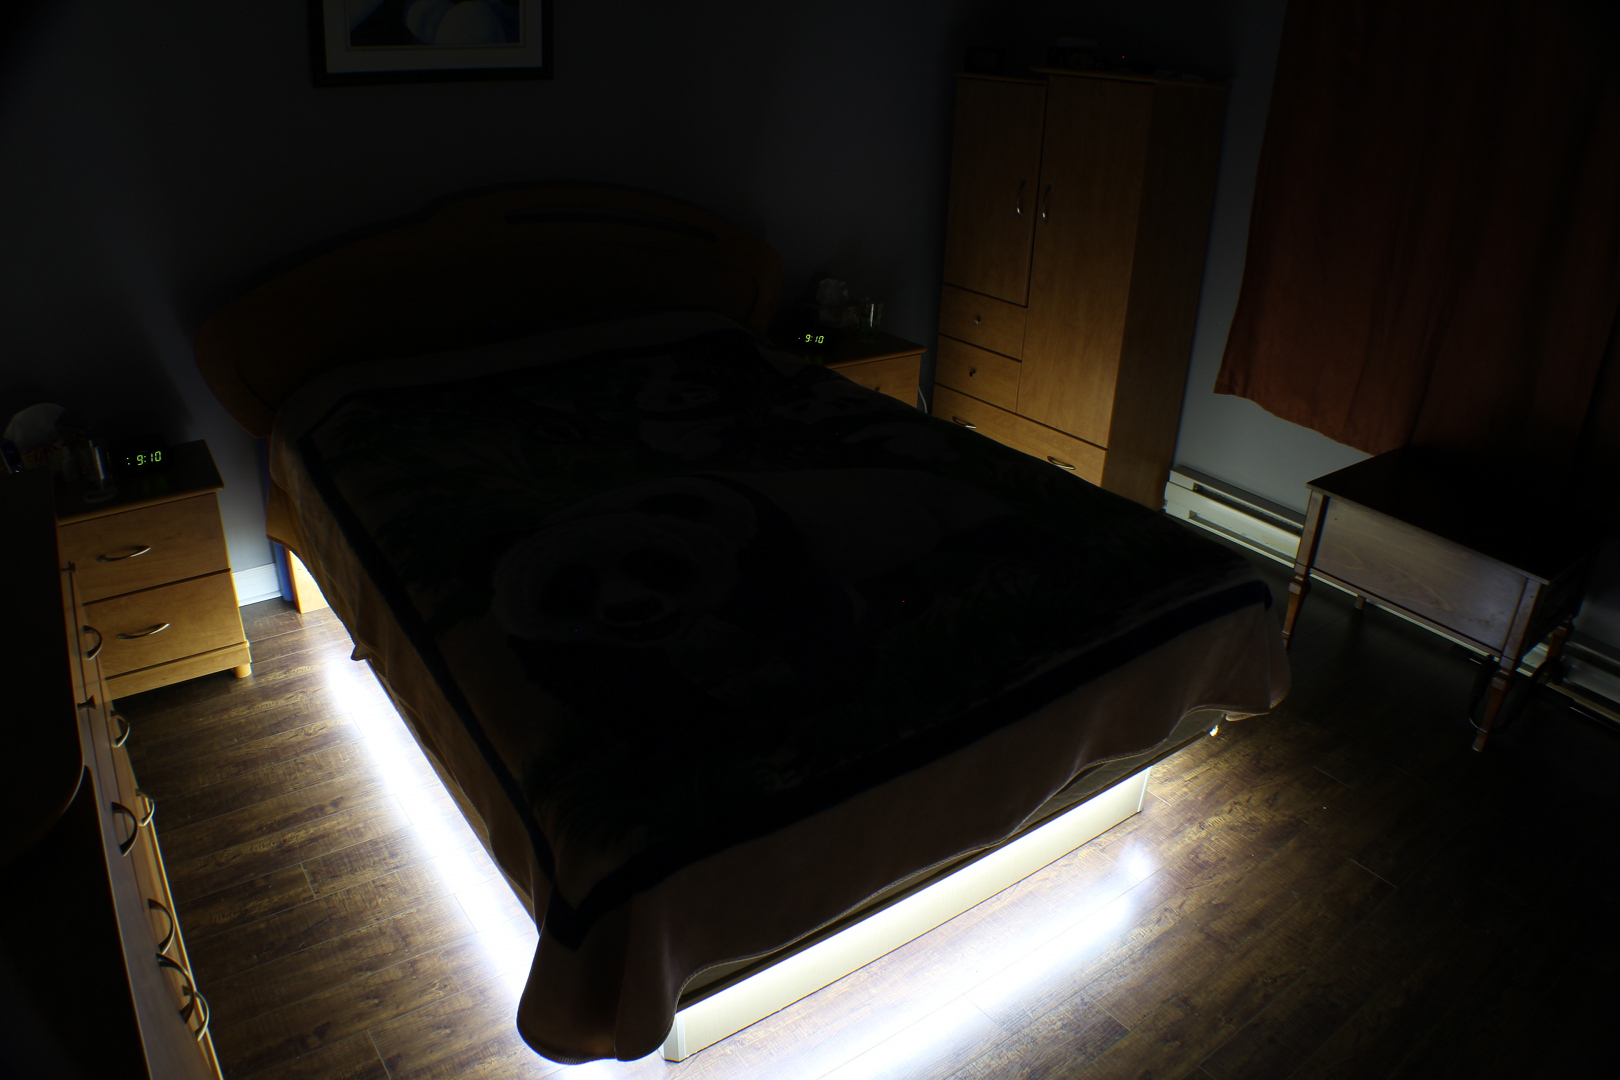
Light running beneath this bed creates a bright outline along the floor while the mattress and cover remain comparatively dark. The recessed base helps conceal the LEDs, so the most noticeable feature is the glow on the wood flooring.
This approach works best when you can keep the bed perimeter clear enough for the line to read. Look underneath your own frame before buying anything, noting its supports, moving parts, and available mounting surfaces.
Choose a complete lighting kit suited to that location and follow its clearance instructions. Avoid letting loose bedding rest against the installation.
Adjustable brightness is useful because reflective floors can make a modest strip appear intense. Keep the effect low enough to remain comfortable from bed.
5. Bring a Broad Underglow to an Open-Legged Frame
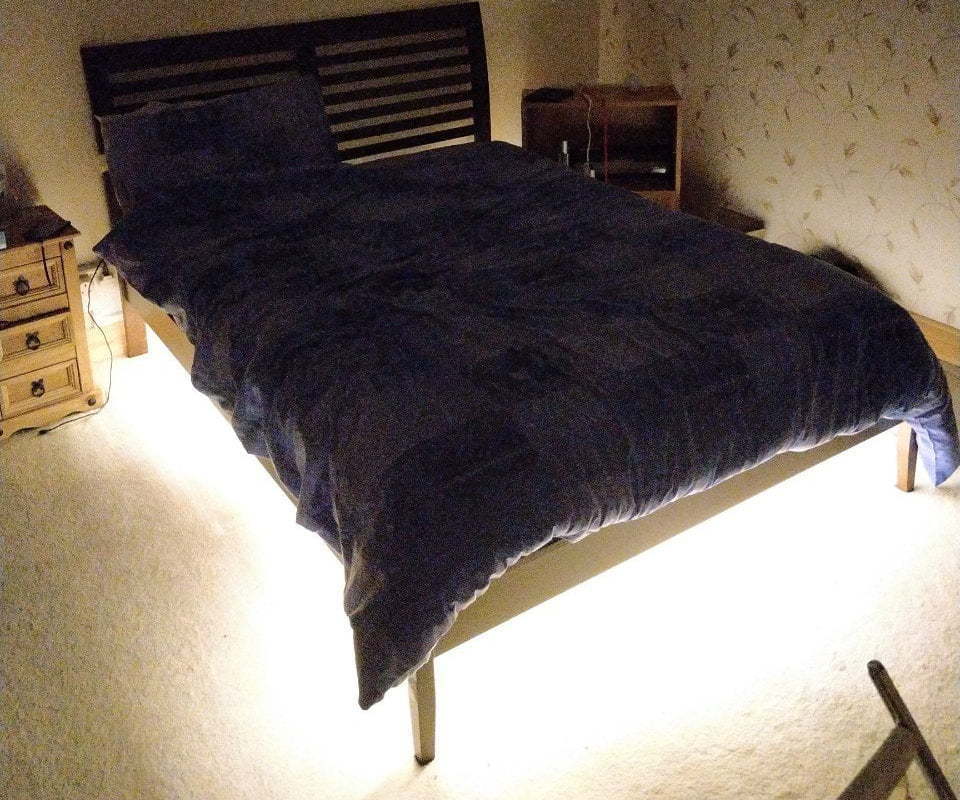
Credits: Terence Eden
An open space beneath the mattress lets light spread farther across the carpet in this bedroom. Unlike a tightly enclosed platform, the visible legs and side rails allow the illuminated floor to become part of the room's atmosphere.
This is an option for updating a frame you own, provided its construction offers a suitable place for an approved lighting system. Begin with a low brightness setting and inspect the result from the doorway and pillow height.
A broad glow can become stronger than expected when there is little furniture underneath to interrupt it. Keep storage boxes and loose cords out of the light path.
The photograph also shows why bedding length matters: an exposed lower rail leaves the effect visible.
6. Draw a Loose Wave Above the Bed
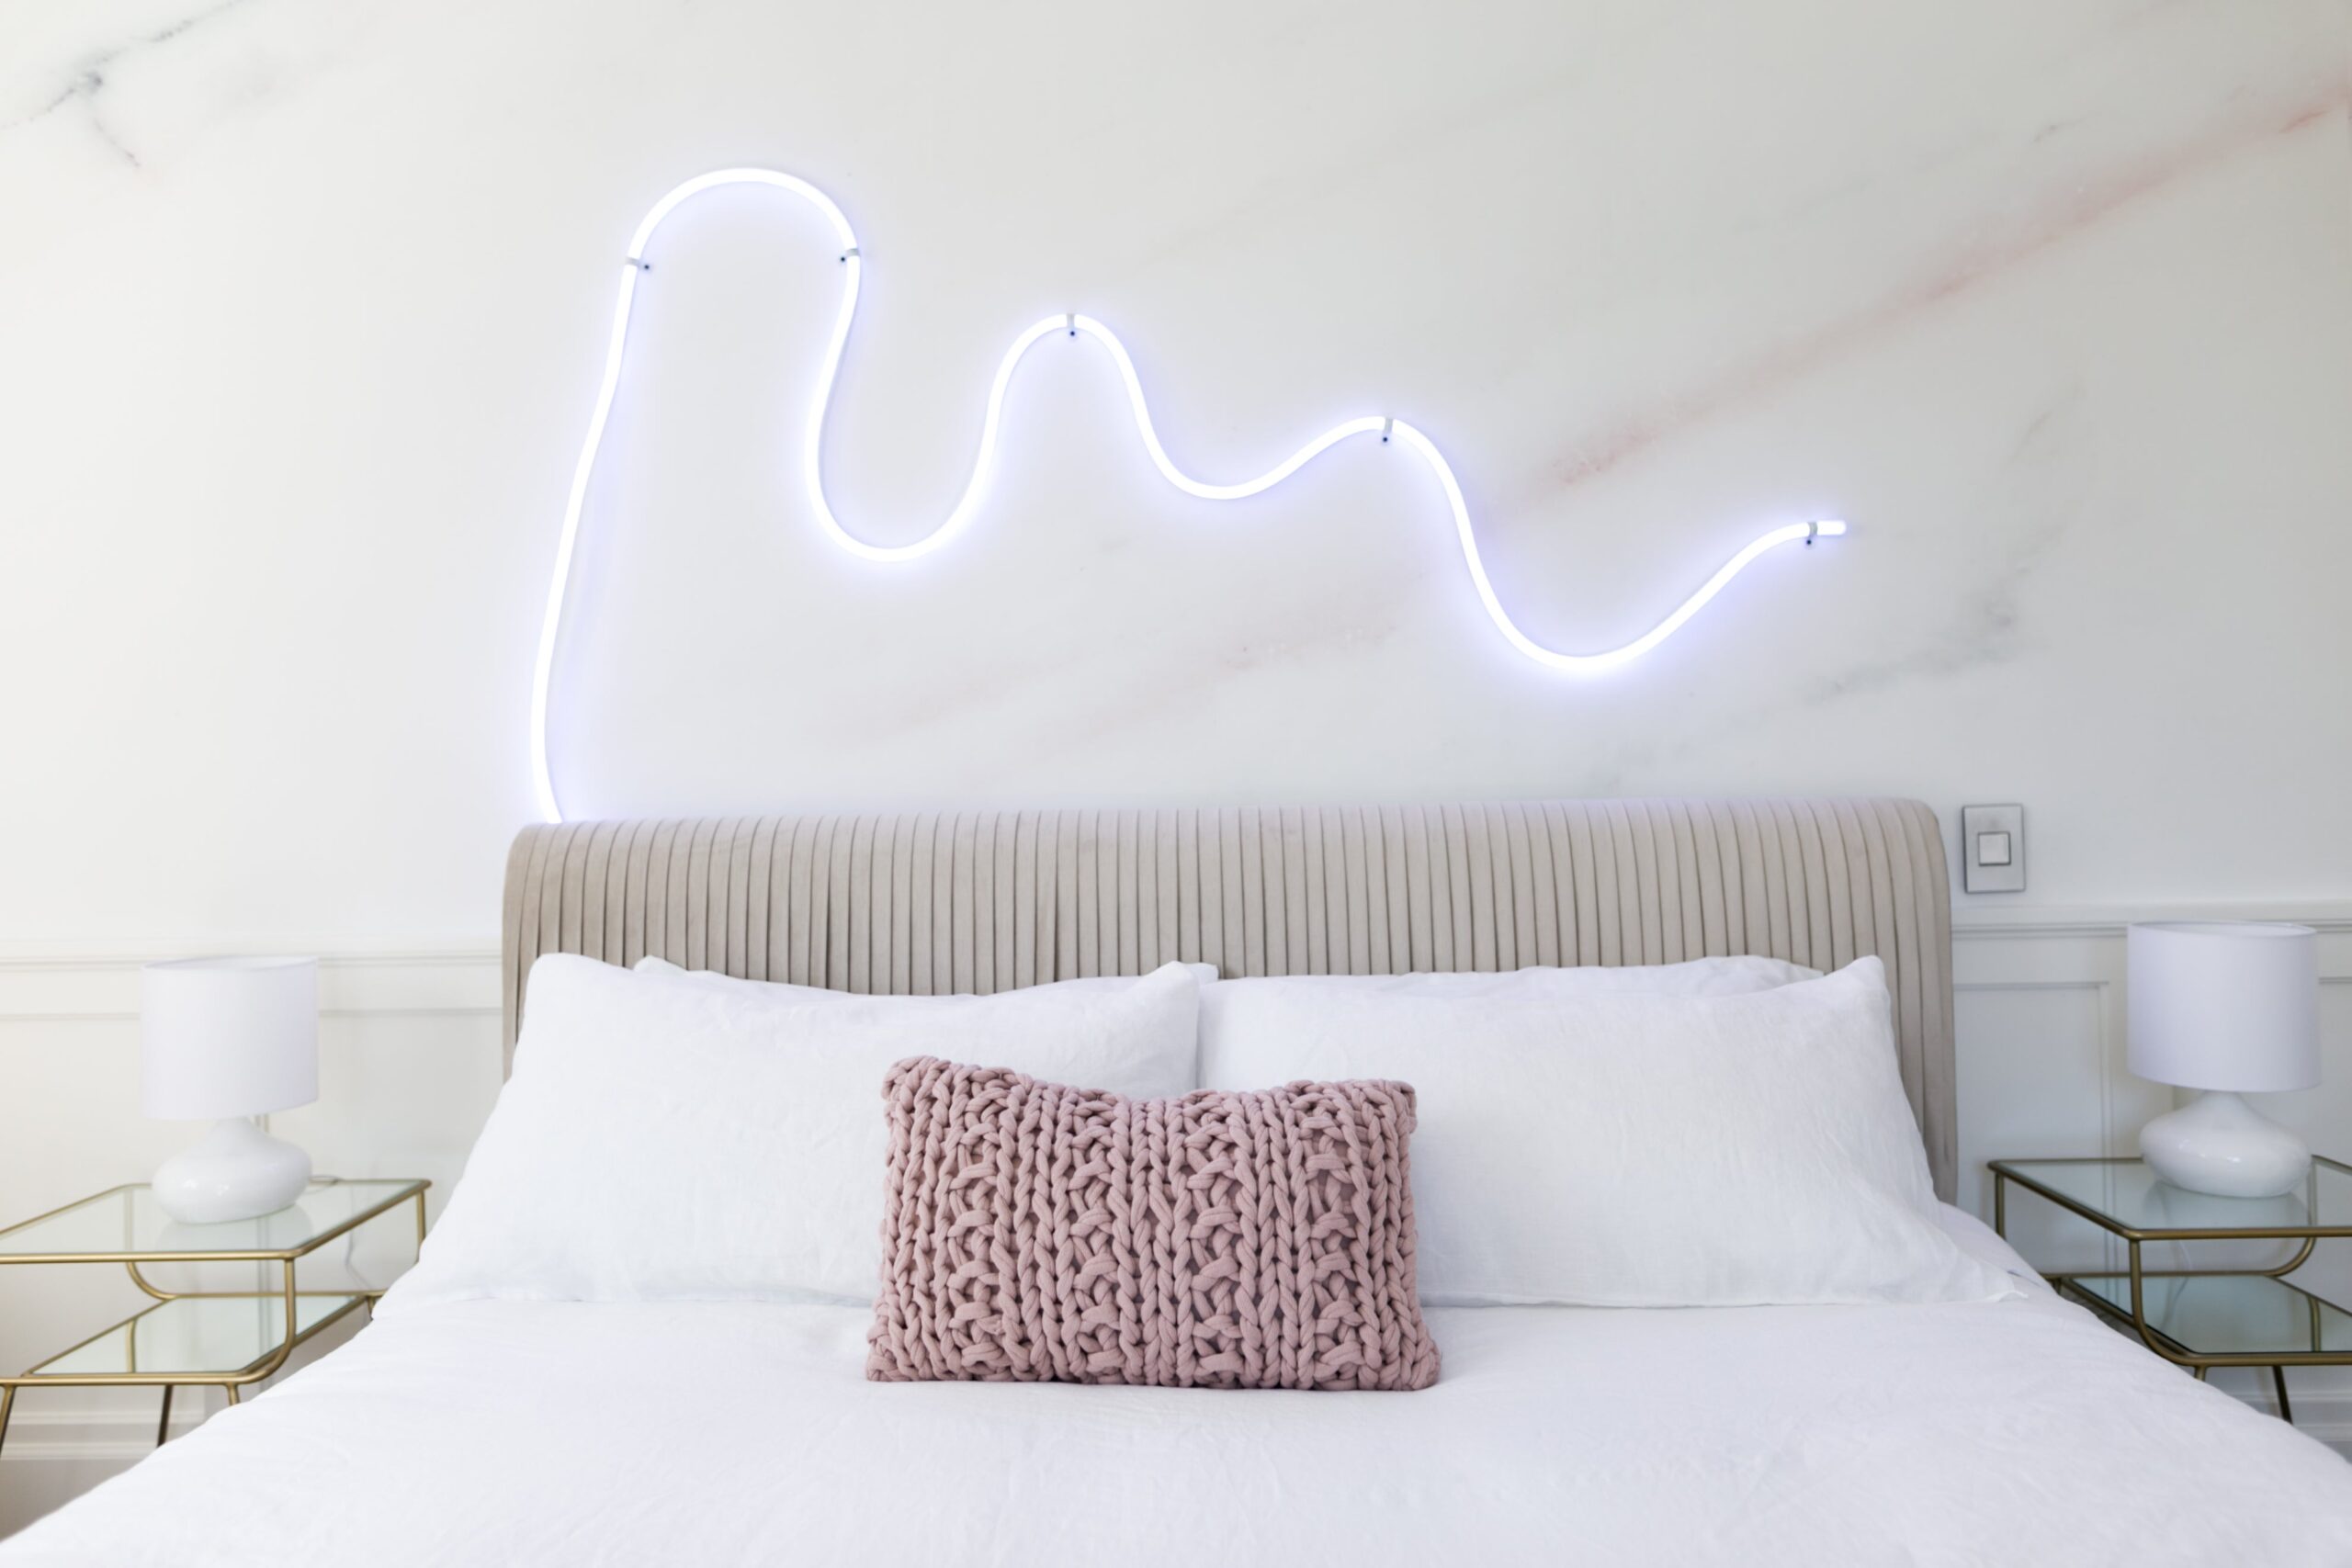
Credits: Mr. Kate
A glowing white wave takes the place of artwork above this upholstered bed. Its relaxed bends contrast with the headboard's vertical channels, while the pale wall and simple bedding leave the line easy to see.
Flexible LED neon-style lighting can make a large statement without a heavy frame or several prints. Sketch the shape at the intended scale before choosing your mounting points.
Broad curves usually read more clearly than a complicated drawing, particularly from the bedroom doorway. Follow the product's bend limits and mounting guidance instead of forcing tight corners.
Leave enough blank wall around the shape to give it breathing room. A dimmable version lets the same design serve as a bright focal point or quieter evening accent.
7. Arrange Light Panels as Geometric Wall Art
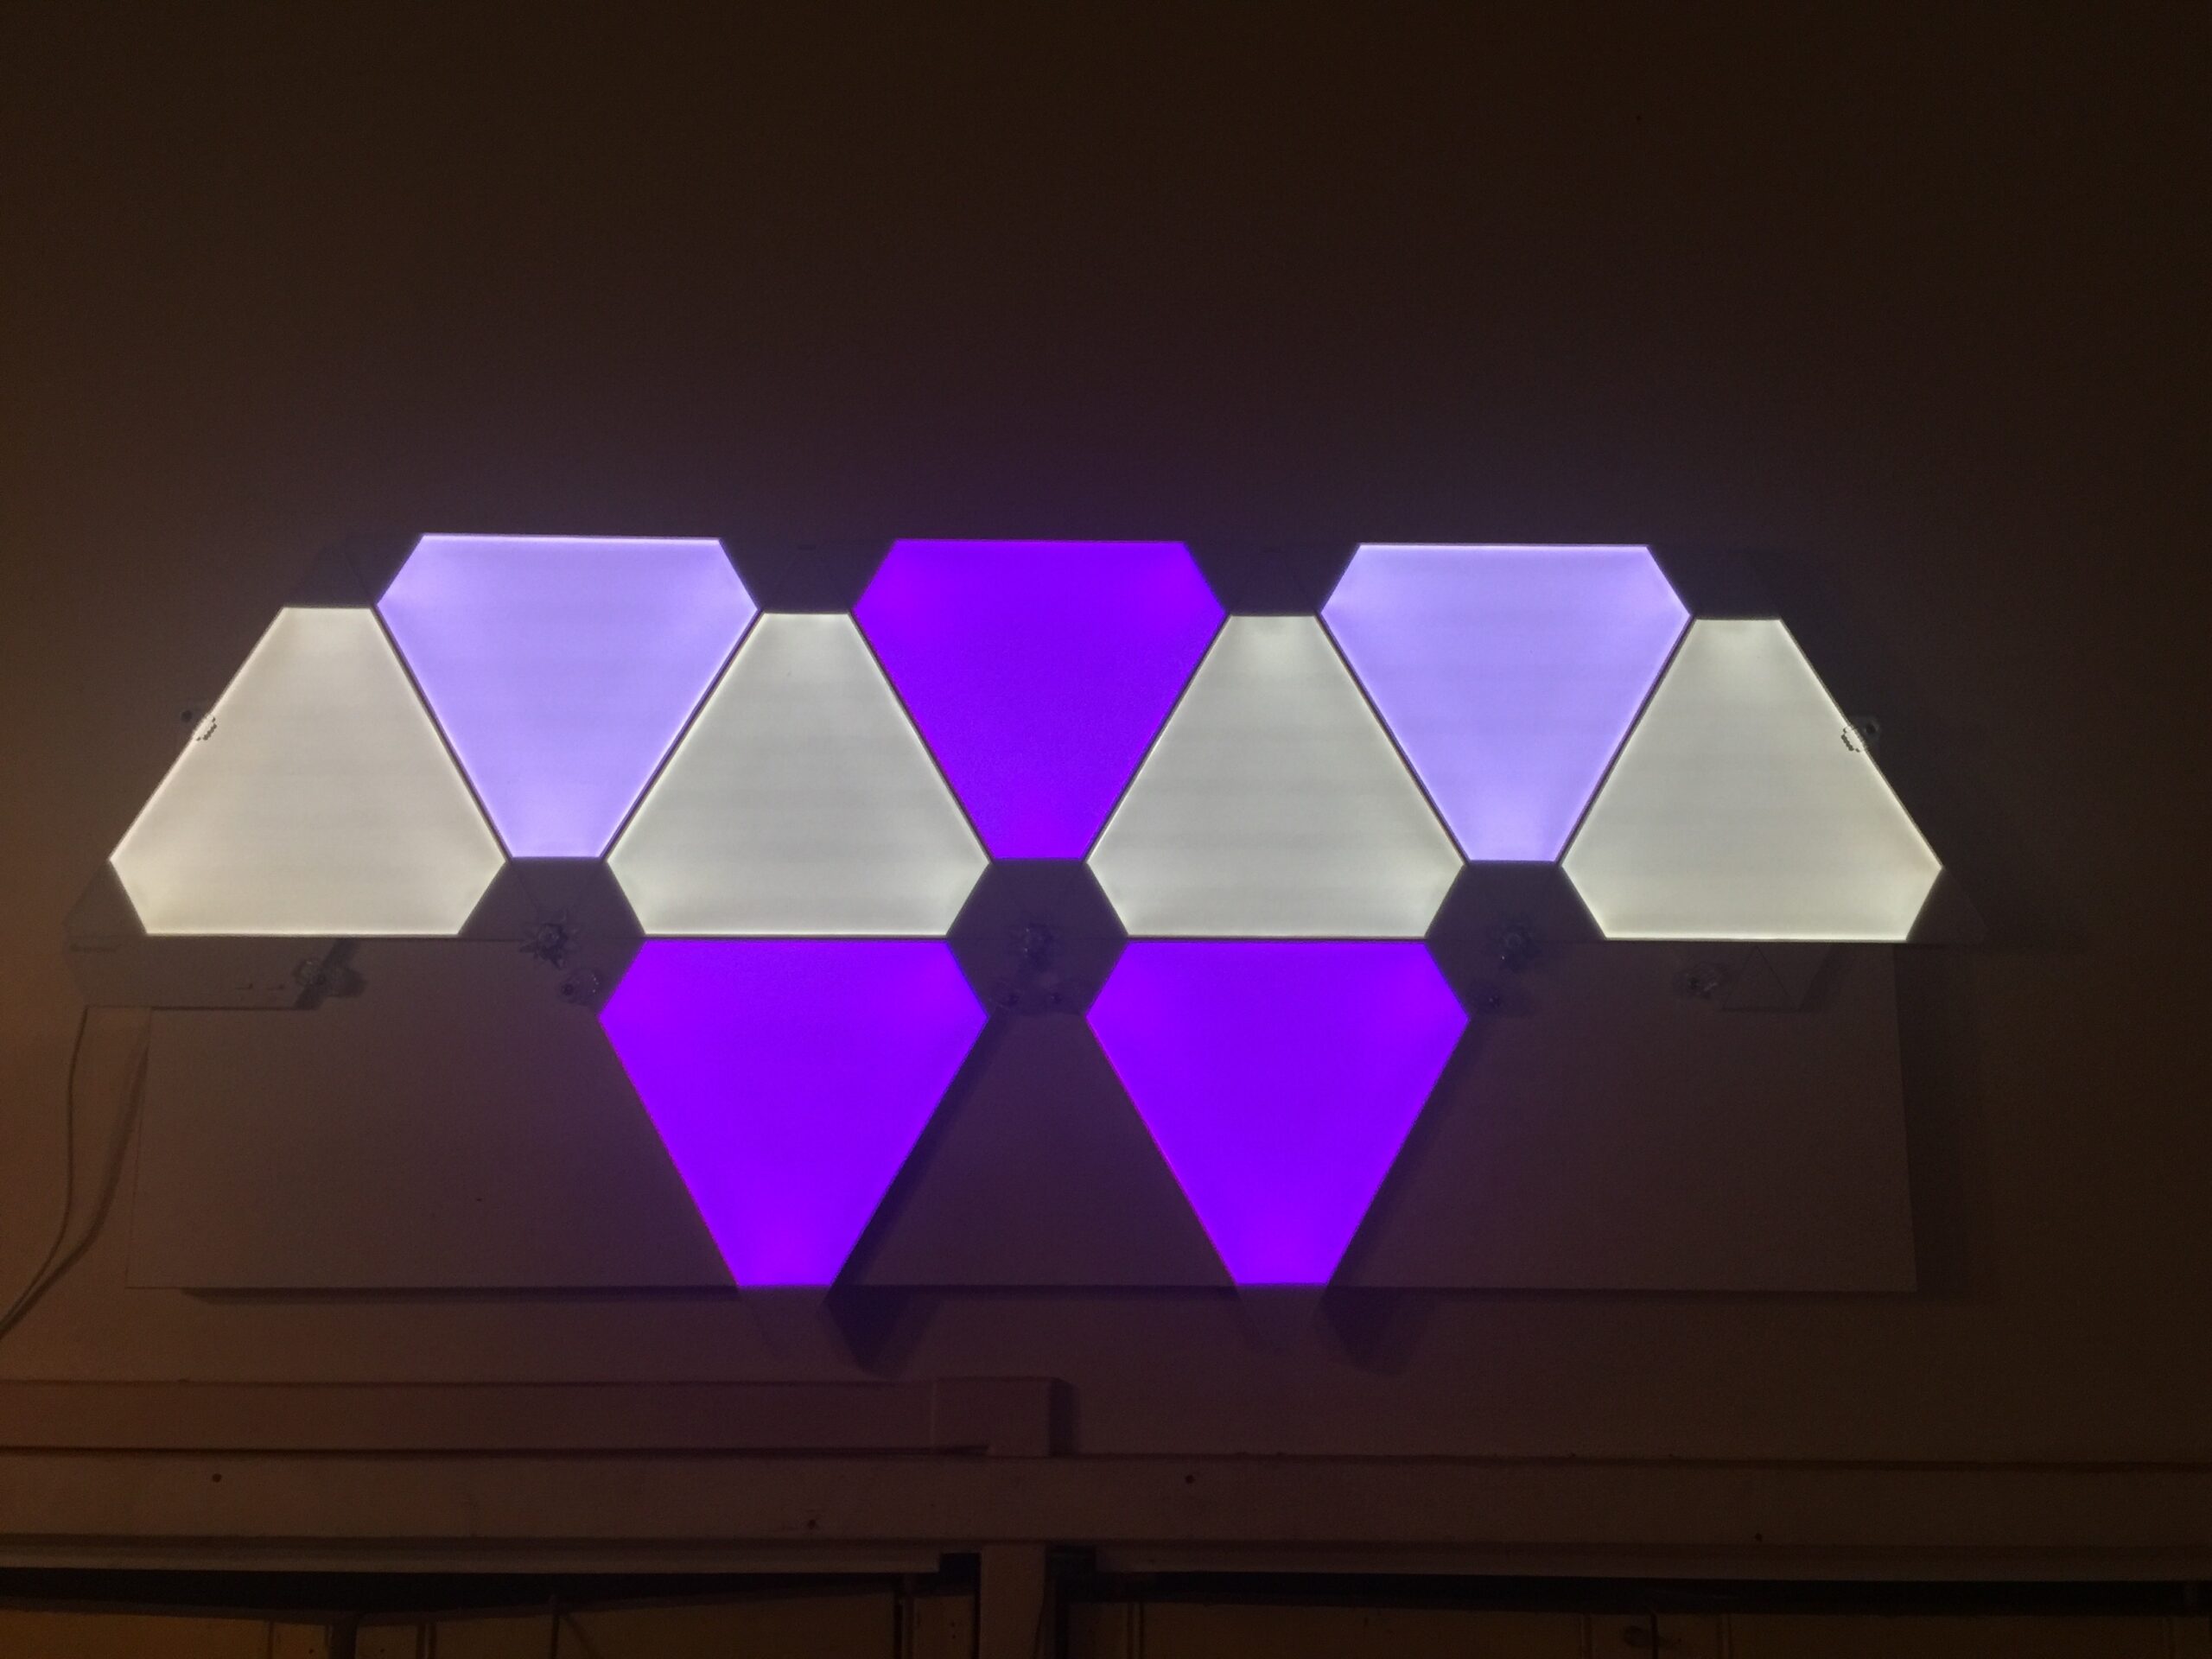
Credits: asatoran / Can You Explain That Again?
Triangular light panels form a geometric composition above the bedroom's trim. Purple and white sections give the arrangement variation without needing several fixtures around the room.
The visible backing keeps the pieces together as one object, which is useful when you want to plan the layout before hanging it.
Make a paper template of your preferred arrangement and check its proportions against nearby doors, furniture, and artwork. Use the mounting system specified for the panels and wall surface, including the finished assembly's weight.
Start with a restrained color scene so the shape stays legible. Dimming can make a large difference to the experience from bed.
Leave access to the controller and connections, especially if you expect to rearrange the panels.
8. Backlight a Simple Wooden Shape
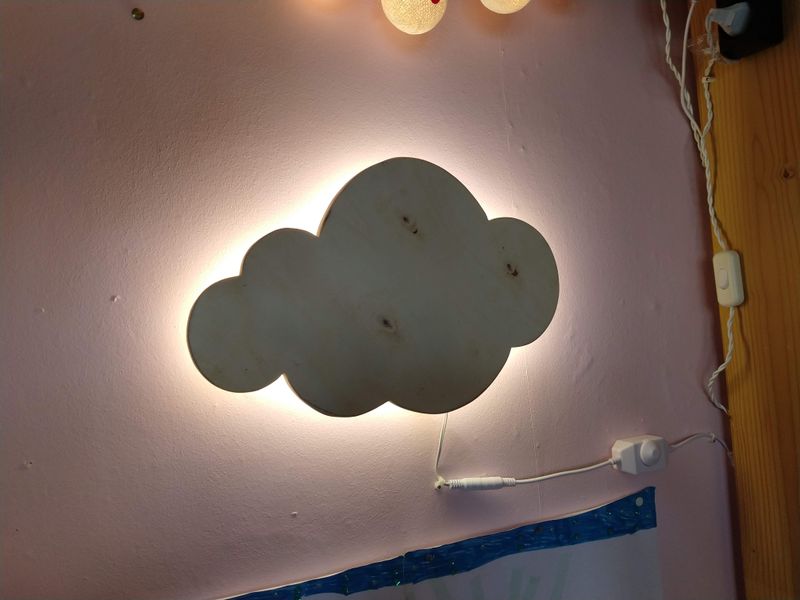
Credits: Maarten Cammaert / Sometimes I Make
A plywood cloud stands away from the pink wall, allowing a soft halo to outline its rounded silhouette. The wood remains the visible decorative surface while the LED strip is tucked behind it.
This turns a wall light into something that belongs to the bedroom's theme without covering the wall in additional accessories. Choose a simple shape that remains recognizable when the surrounding light is low.
Plan a safe mounting arrangement and an accessible control before deciding where the piece will go. The photographed inline dimmer illustrates how brightness can be adjusted independently.
Keep cords secured and away from the sleeping area, particularly in a child's room. A single backlit shape can provide plenty of character beside otherwise quiet bedding.
9. Outline a Dark Ceiling With One Strong Color
Credits: Michelle and Steph / Sunnyside Home
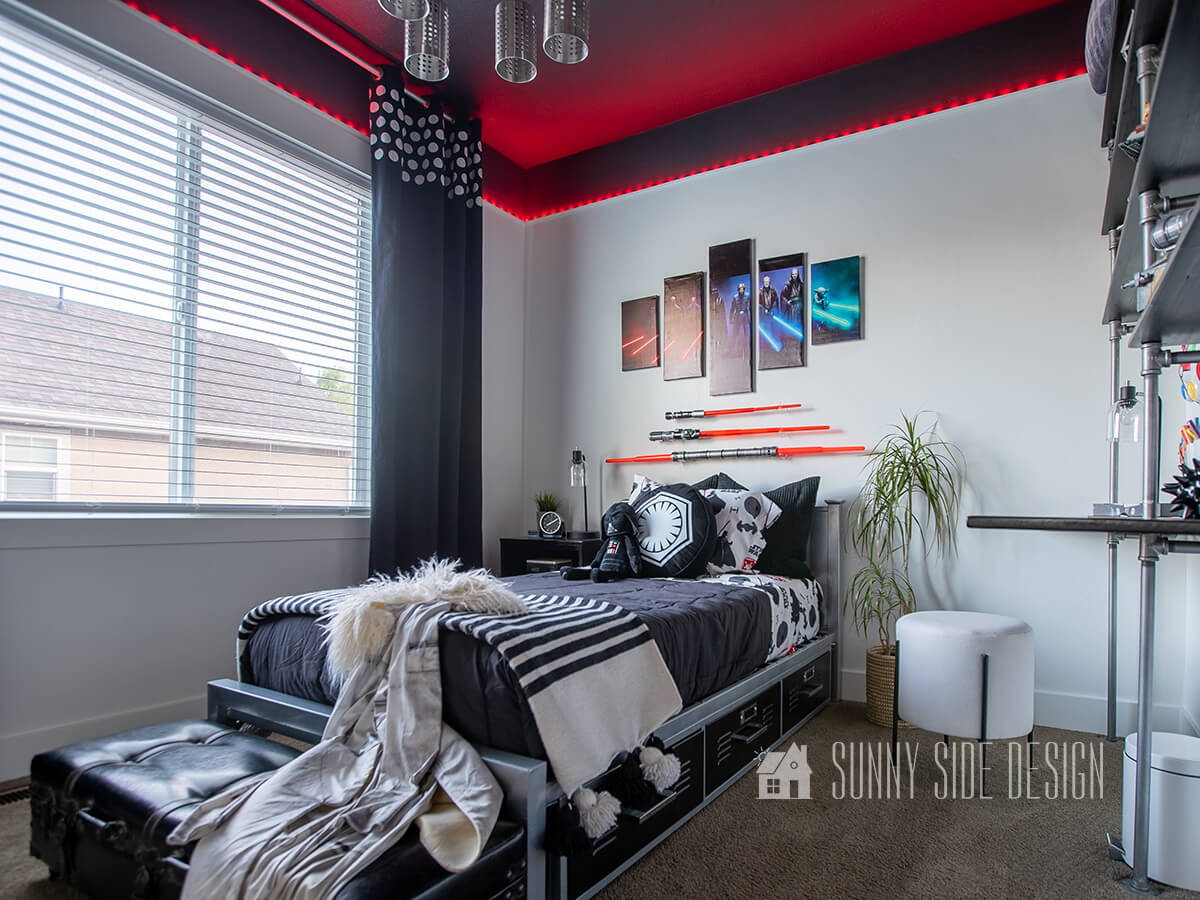
A red LED border follows the ceiling line in this black and white bedroom. Because the upper wall and ceiling are dark, the glow becomes a strong architectural edge, echoing the red accents in the wall display.
This is a useful way to introduce color without repainting every wall or changing the furniture. Plan the full route first, including corners, the power connection, and any breaks around doors or windows.
A concealed mounting detail can make the daytime appearance more intentional. Choose a system that can dim or change to a quieter setting when the bold color feels too intense.
Keeping bedding mostly neutral helps the illuminated perimeter remain the main effect rather than competing with several equally vivid patterns.
10. Hide the Vertical Feed Beside a Curtain
Credits: Lindsey Manning / Repurpose and Upcycle
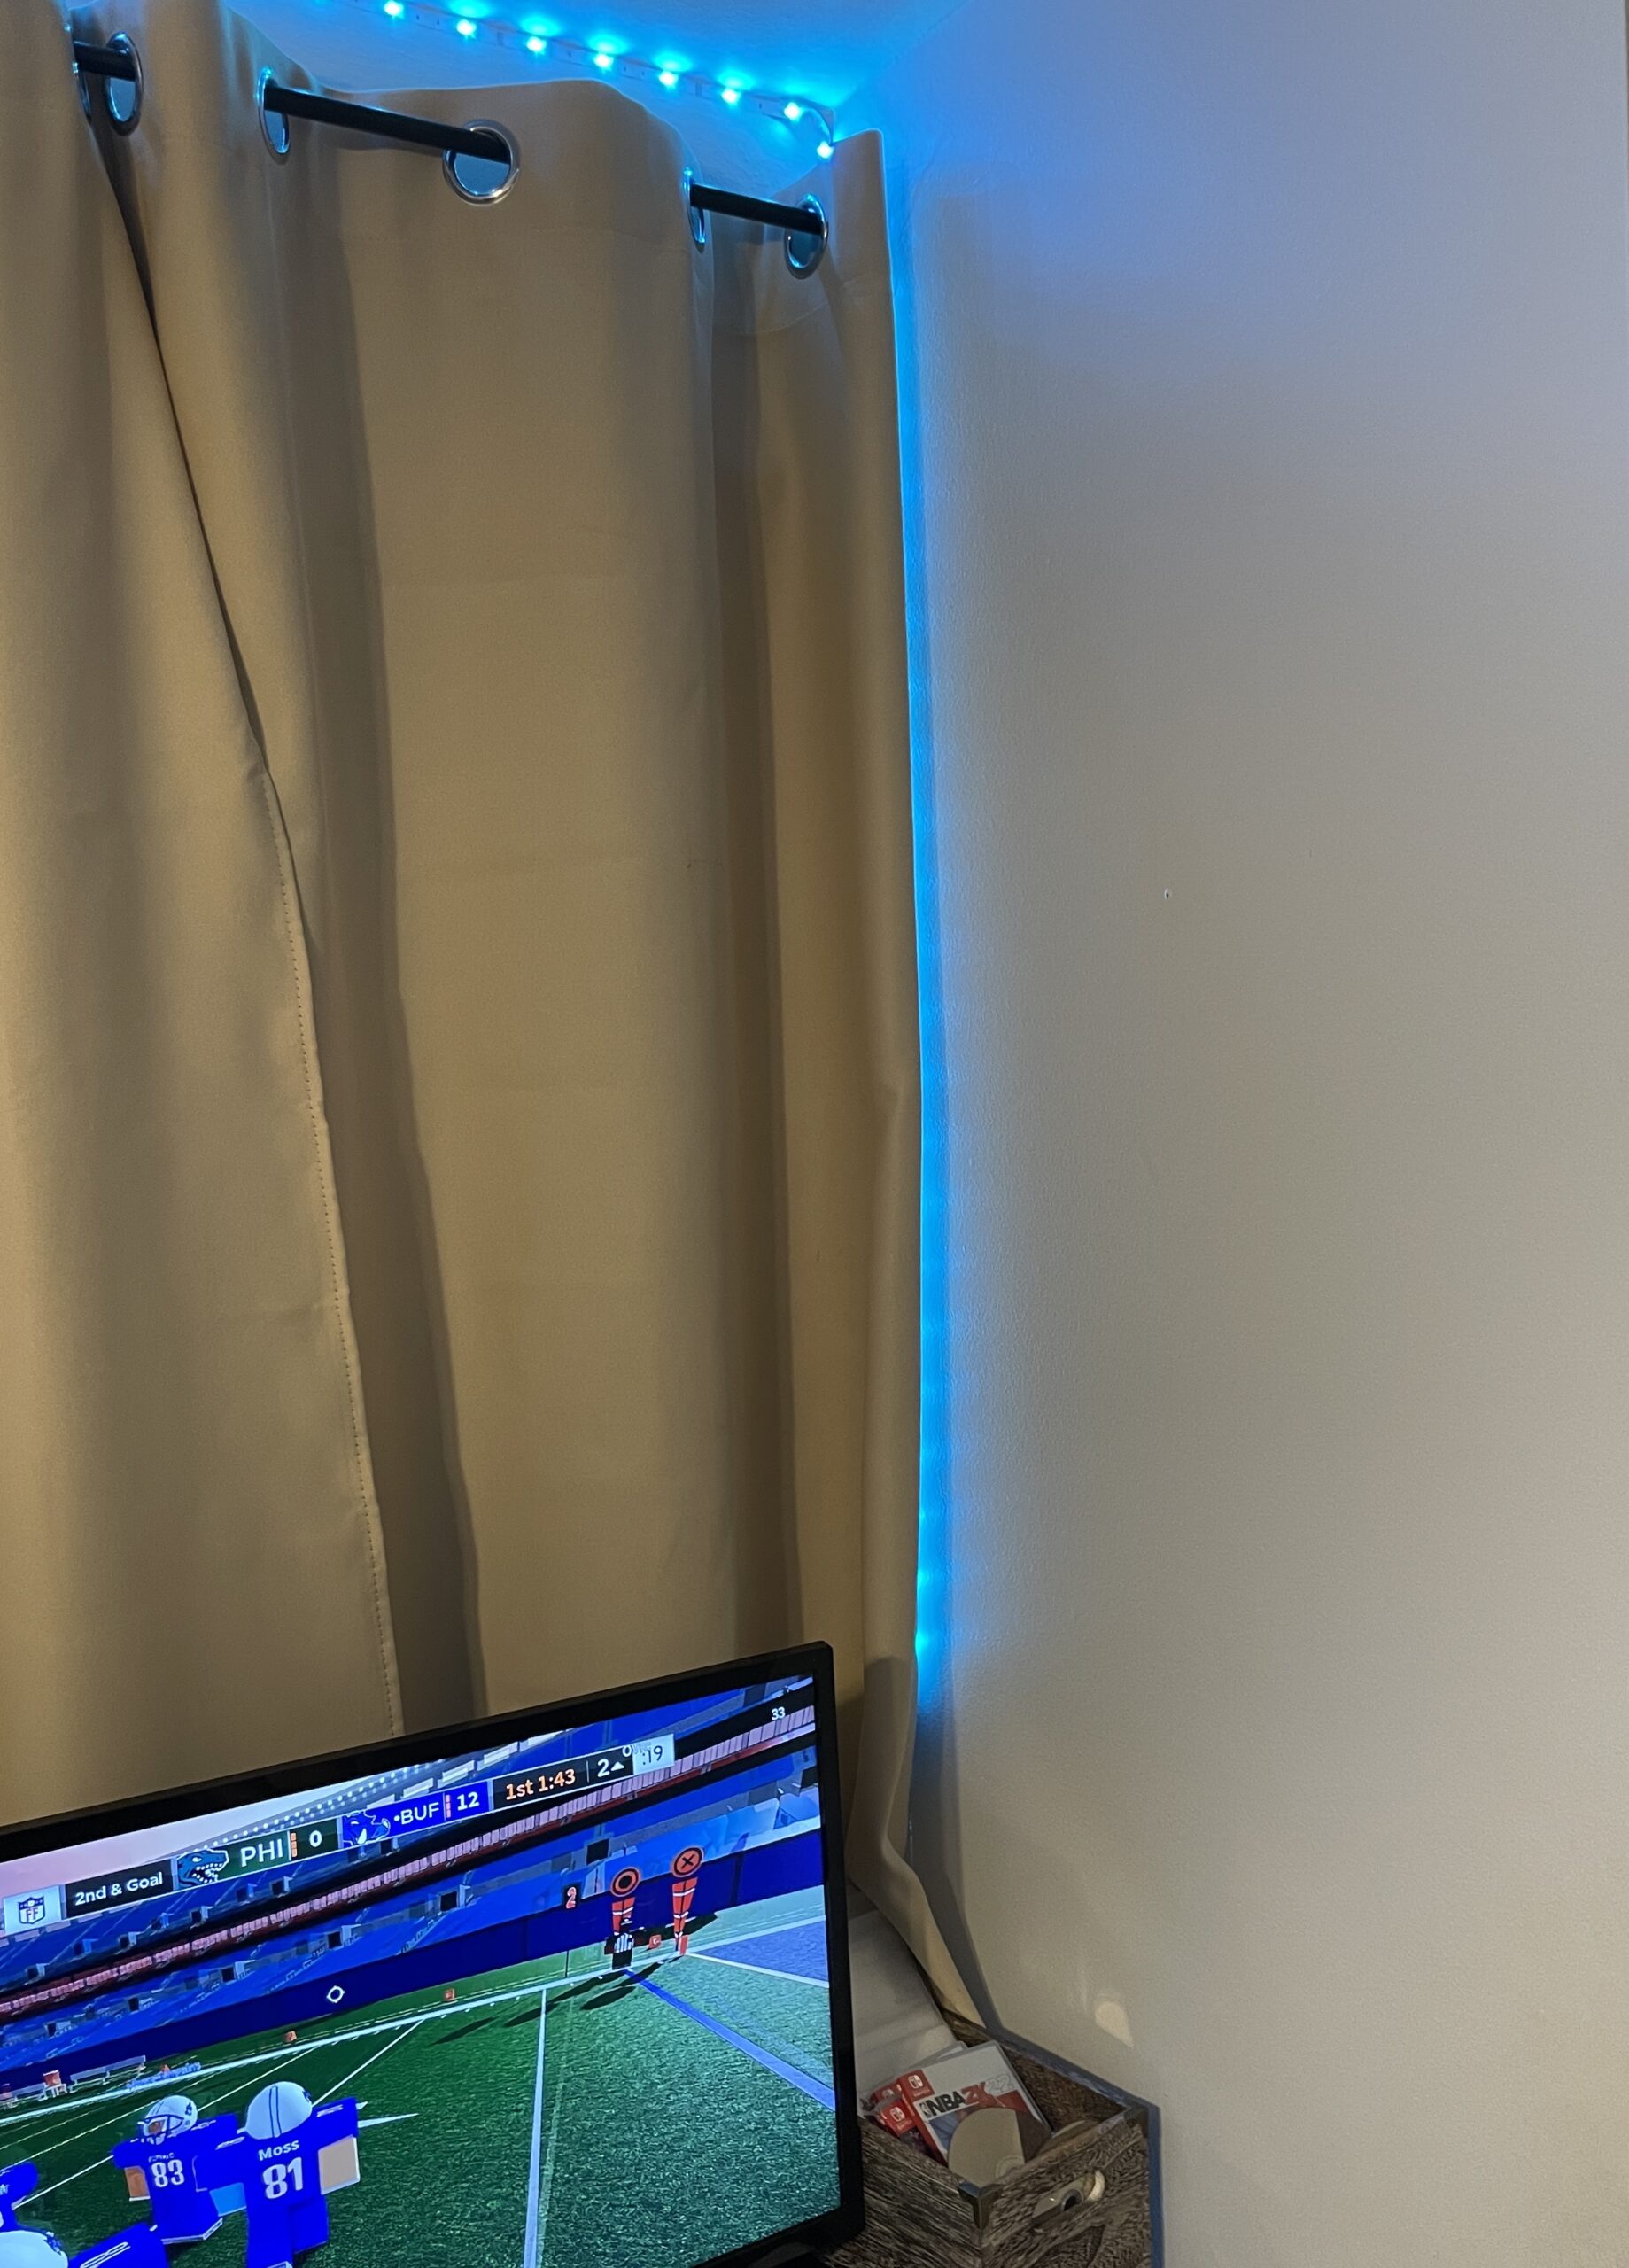
Getting a strip up to the ceiling can leave an illuminated line down the wall. In this bedroom corner, the curtain provides a place to conceal that vertical run while the blue light continues above the window.
The close view is useful because it shows how the installation relates to real trim, fabric, and furniture. Plan the power route before attaching the first section, rather than solving it after the perimeter is complete.
Keep the curtain's movement clear and follow the lighting manufacturer's required separation from fabric. A suitable cable cover may provide a cleaner solution for an unlit lead.
Test the view with curtains open and closed so the arrangement works during the day as well as at night.
11. Use a Dense LED Strip for a Finer Ceiling Line
Credits: JoeHx Blog
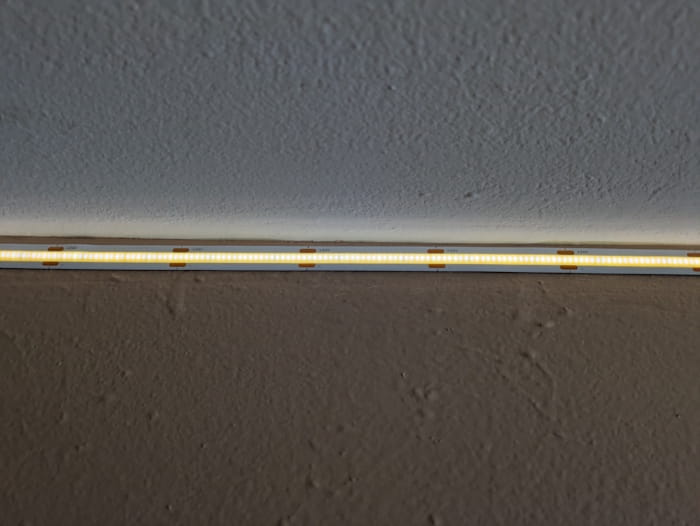
This close view shows a narrow chip-on-board LED strip running along the junction between wall and ceiling.
Its closely packed light points create a finer illuminated band than widely spaced individual bulbs, which can suit a bedroom where you want the line itself to stay subtle.
The detail also makes the mounting location easy to understand before attempting a similar effect. Compare actual samples at the distance from which you will usually see them.
A diffuser and suitable channel can change the appearance further, depending on the system you choose. Plan an accessible dimmer because a continuous run can feel bright in a room.
Keep the color consistent around the perimeter, and check corners carefully for a tidy, supported finish.
12. Bounce Light Inside a Bedroom Alcove
Credits: apalrd’s adventures
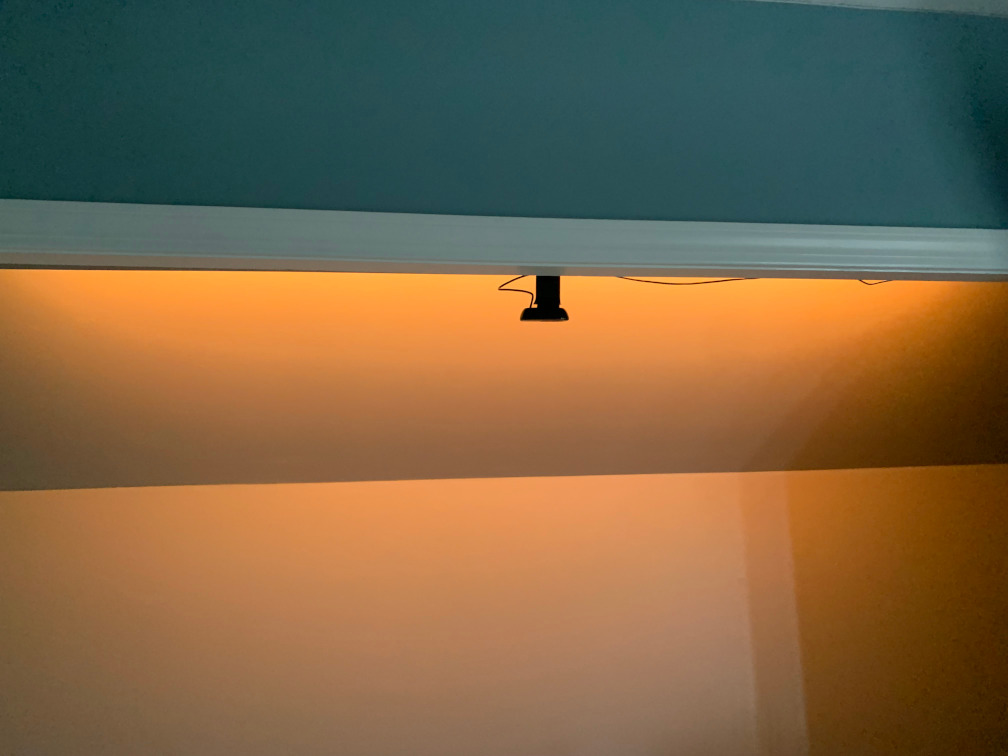
Warm orange light fills the sloping ceiling of this bedroom alcove while the strip remains hidden behind the opening's upper edge. The effect makes a recessed area feel deliberately lit instead of relying entirely on light from the room.
It is useful for a bedroom desk nook, shelving recess, or similar space where an exposed fixture could feel crowded. Aim the LEDs toward a nearby surface so that reflected light does the visual work.
Test the placement before mounting, especially where an angled ceiling might create uneven brightness. Leave the driver and controller accessible for maintenance.
If the alcove is also a workspace, keep a separate practical light available so the colored accent does not have to handle every task.
13. Create a Curtain of Light Behind the Headboard
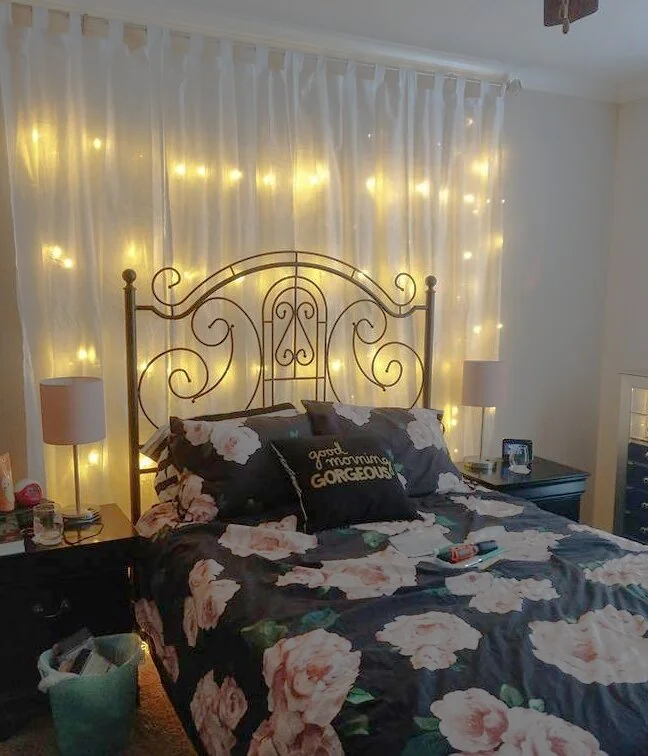
Credits: Samantha Davis / Think Outside the Closet
Small warm LEDs shine through sheer panels behind this metal bed, creating a backdrop with a softer outline than a bare string on the wall.
The ornate headboard remains visible in front, so the curtain adds depth without replacing the furniture. This is a useful option when a bedroom needs a focal point but you prefer fabric to artwork.
Measure the wall and curtain drop before choosing a light set, and keep its power connection accessible. Use products approved for the intended indoor arrangement, with the required separation from textiles.
Secure loose strands away from pillows and sleeping space. Plain sheers let the points of light show through, while the surrounding bedside lamps provide a focused layer for everyday use.
14. Add a Light Strand to an Open Headboard
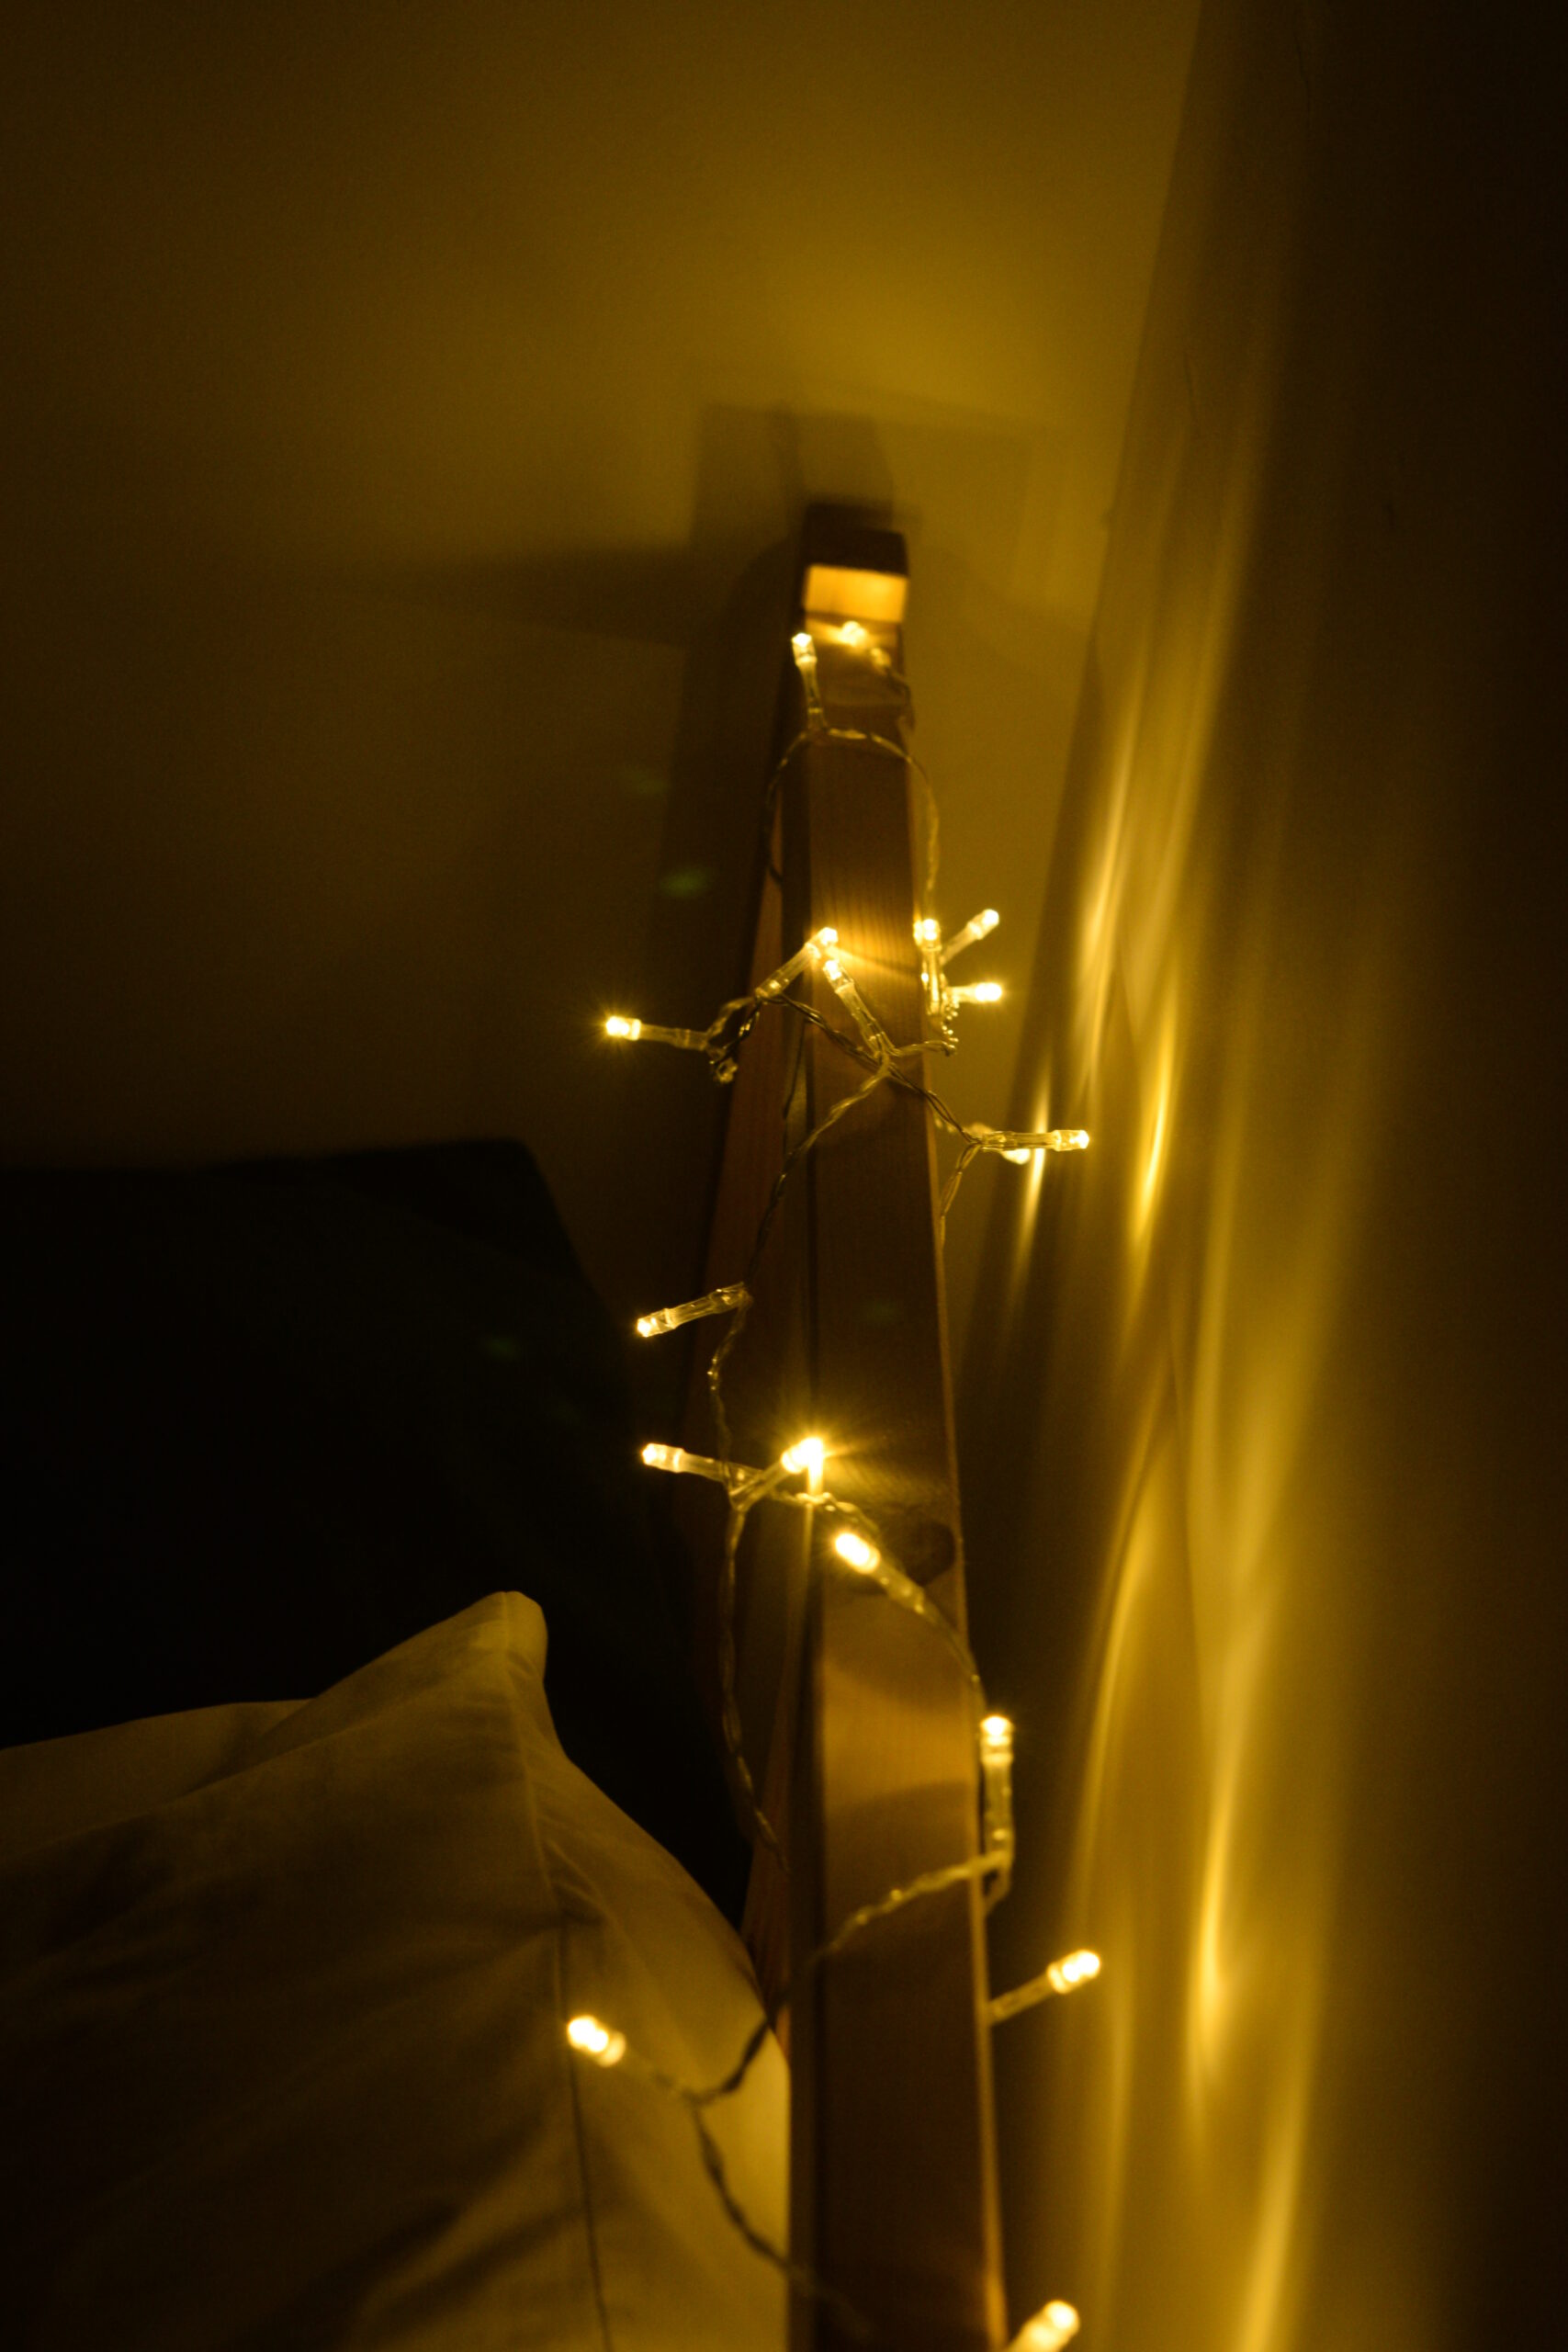
Credits: 2412Life
A strand of warm LEDs follows the exposed wooden rail in this close view. The bulbs pick out the headboard's structure and cast pools of light onto the wall, giving an existing piece of furniture a different evening appearance.
This works especially well when the frame has a clear outline that can still be seen above the pillows. Keep the arrangement simple instead of wrapping every spindle.
Choose a light set intended for the location and keep wires, bulbs, and the battery pack clear of bedding. Secure the strand so it cannot slip into the sleeping area.
An accessible switch makes the accent easier to use. The warm wood and restrained light color keep the effect connected to the furniture.
15. Use Battery LED Sconces to Free the Nightstand
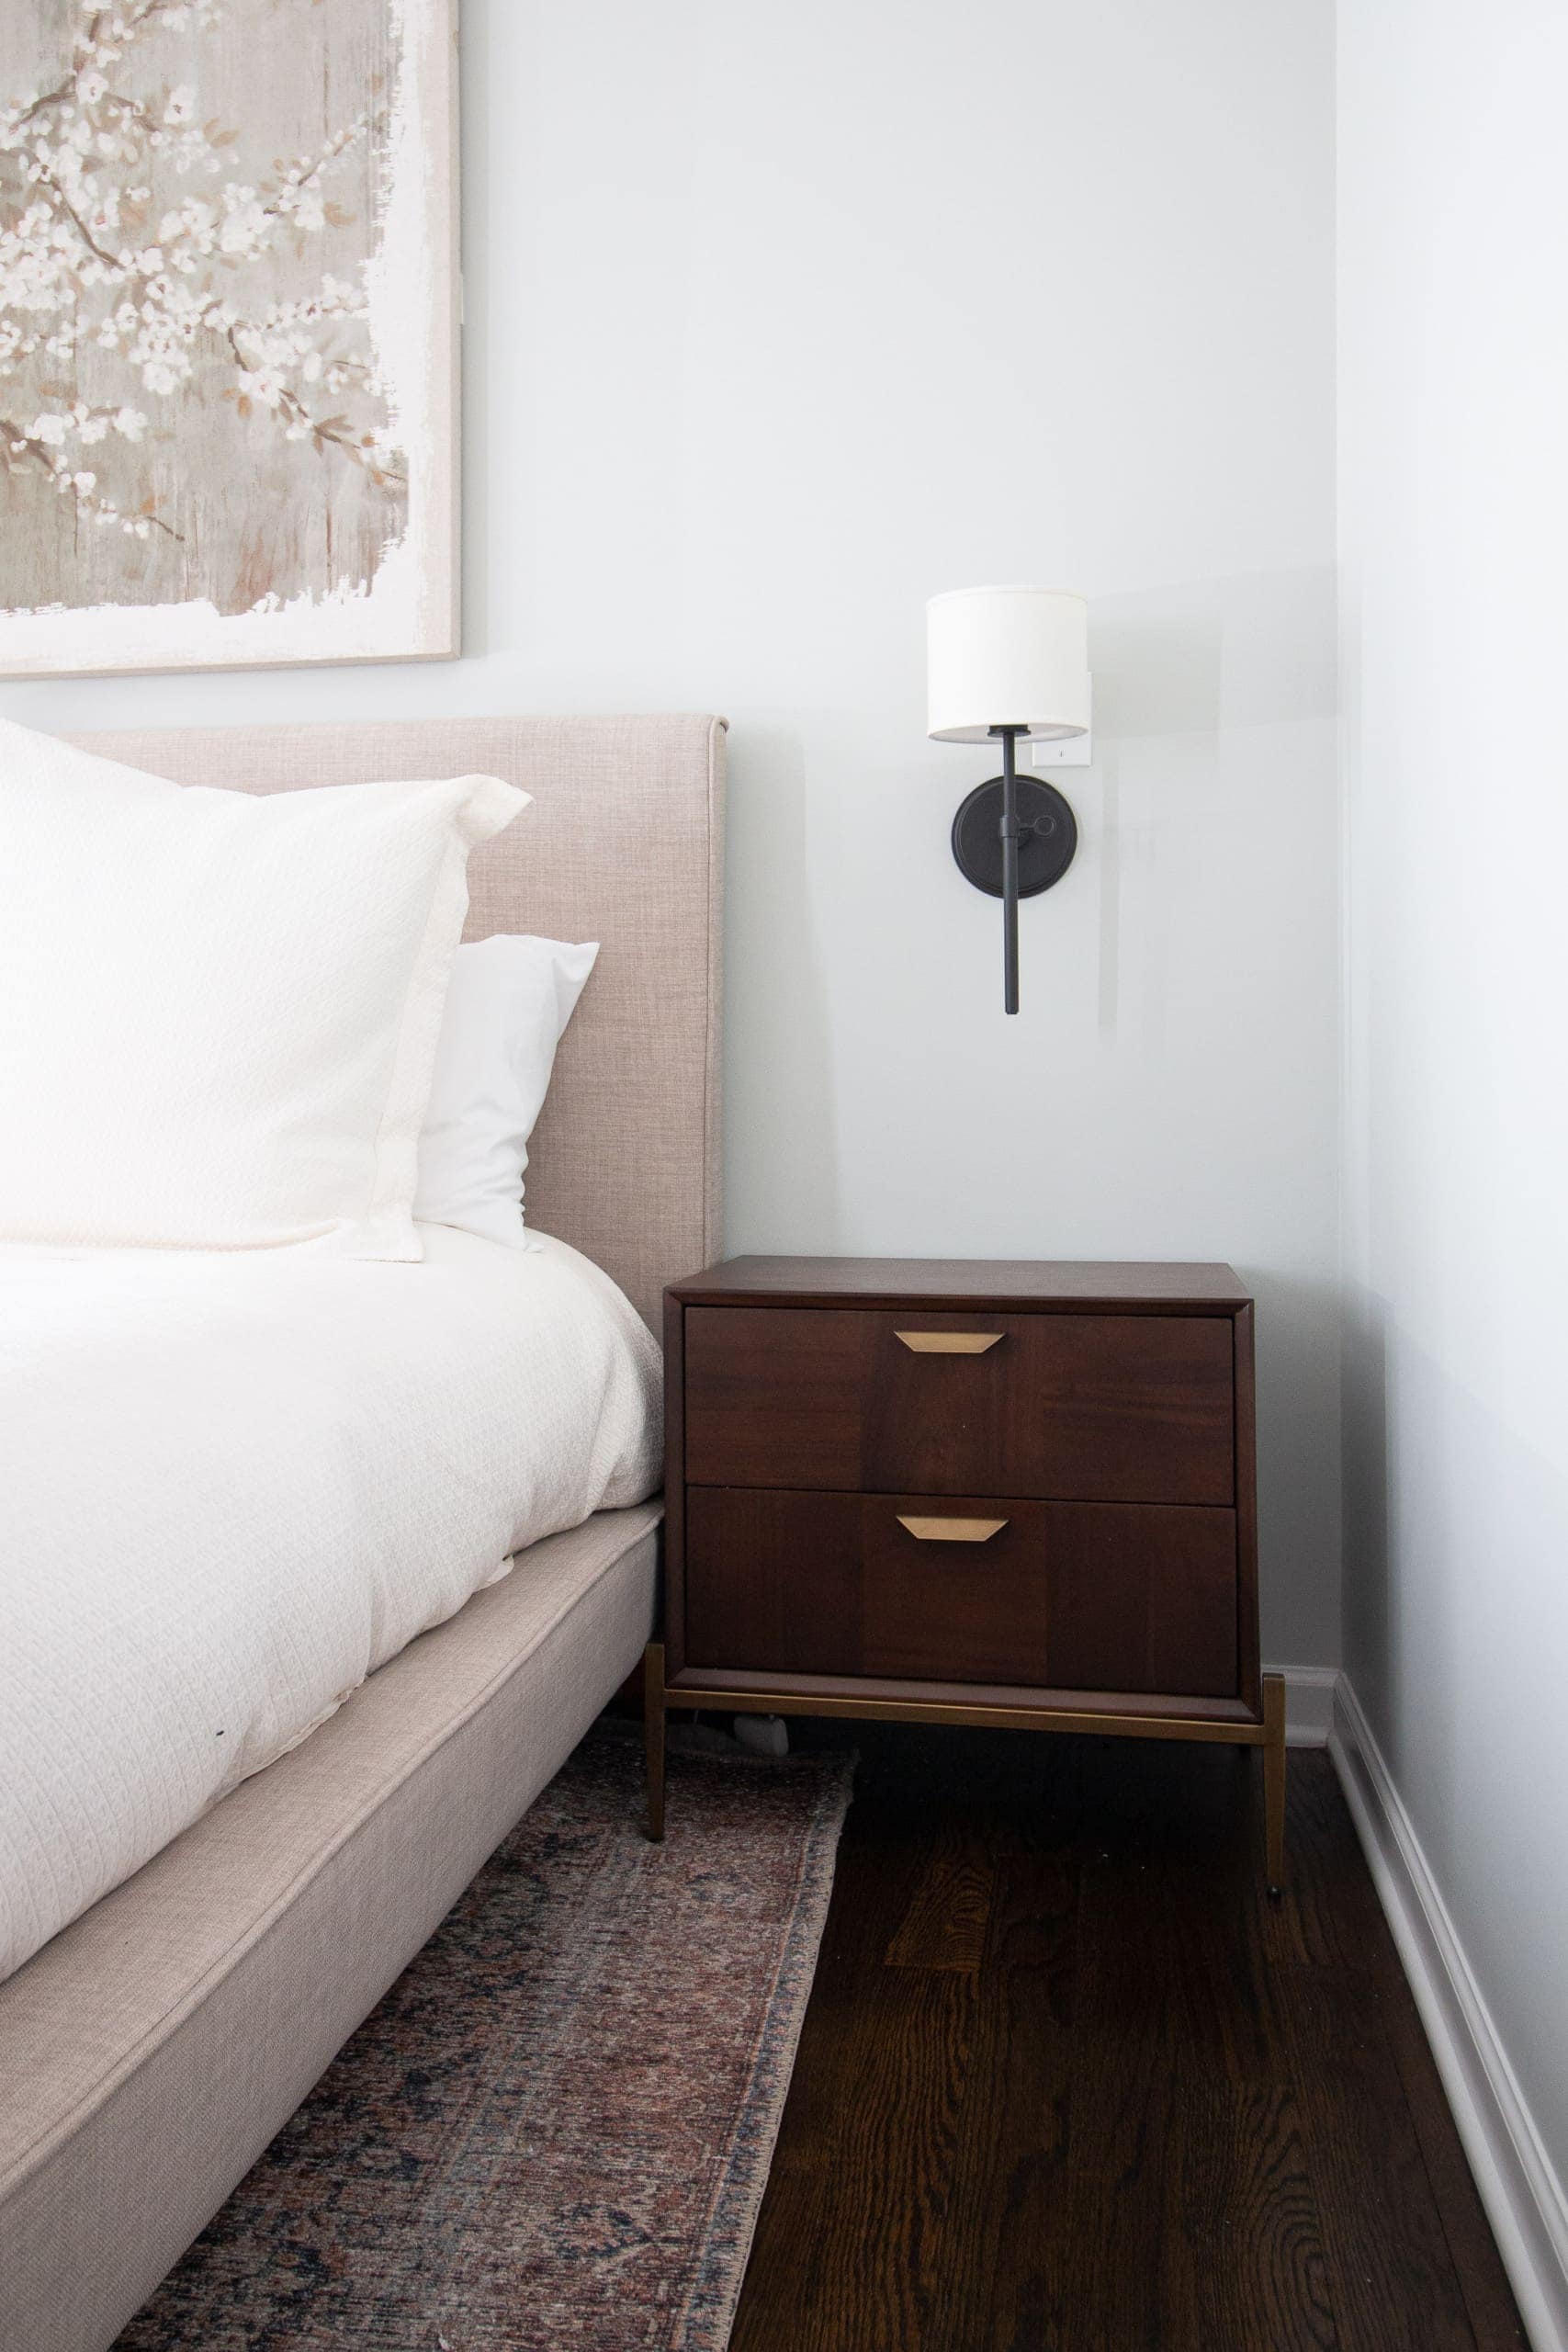
Credits: Casey Finn / The DIY Playbook
A slim black sconce leaves the top of this wooden nightstand available for everyday essentials. The creator's installation uses an LED puck inside the shade, making the wall light possible without adding a hardwired connection at that spot.
It is a useful approach when the desired bedside location does not line up with existing wiring. Check that the chosen fixture can safely accommodate the battery light and that you can reach it for replacement or charging.
Treat it as an accent layer unless its output meets your reading needs. Position the shade around your seated height and test both sides of the bed.
A remote-controlled light can make the setup more convenient while preserving the simple, uncluttered arrangement shown here.
16. Give Twin Beds Their Own LED Pendants
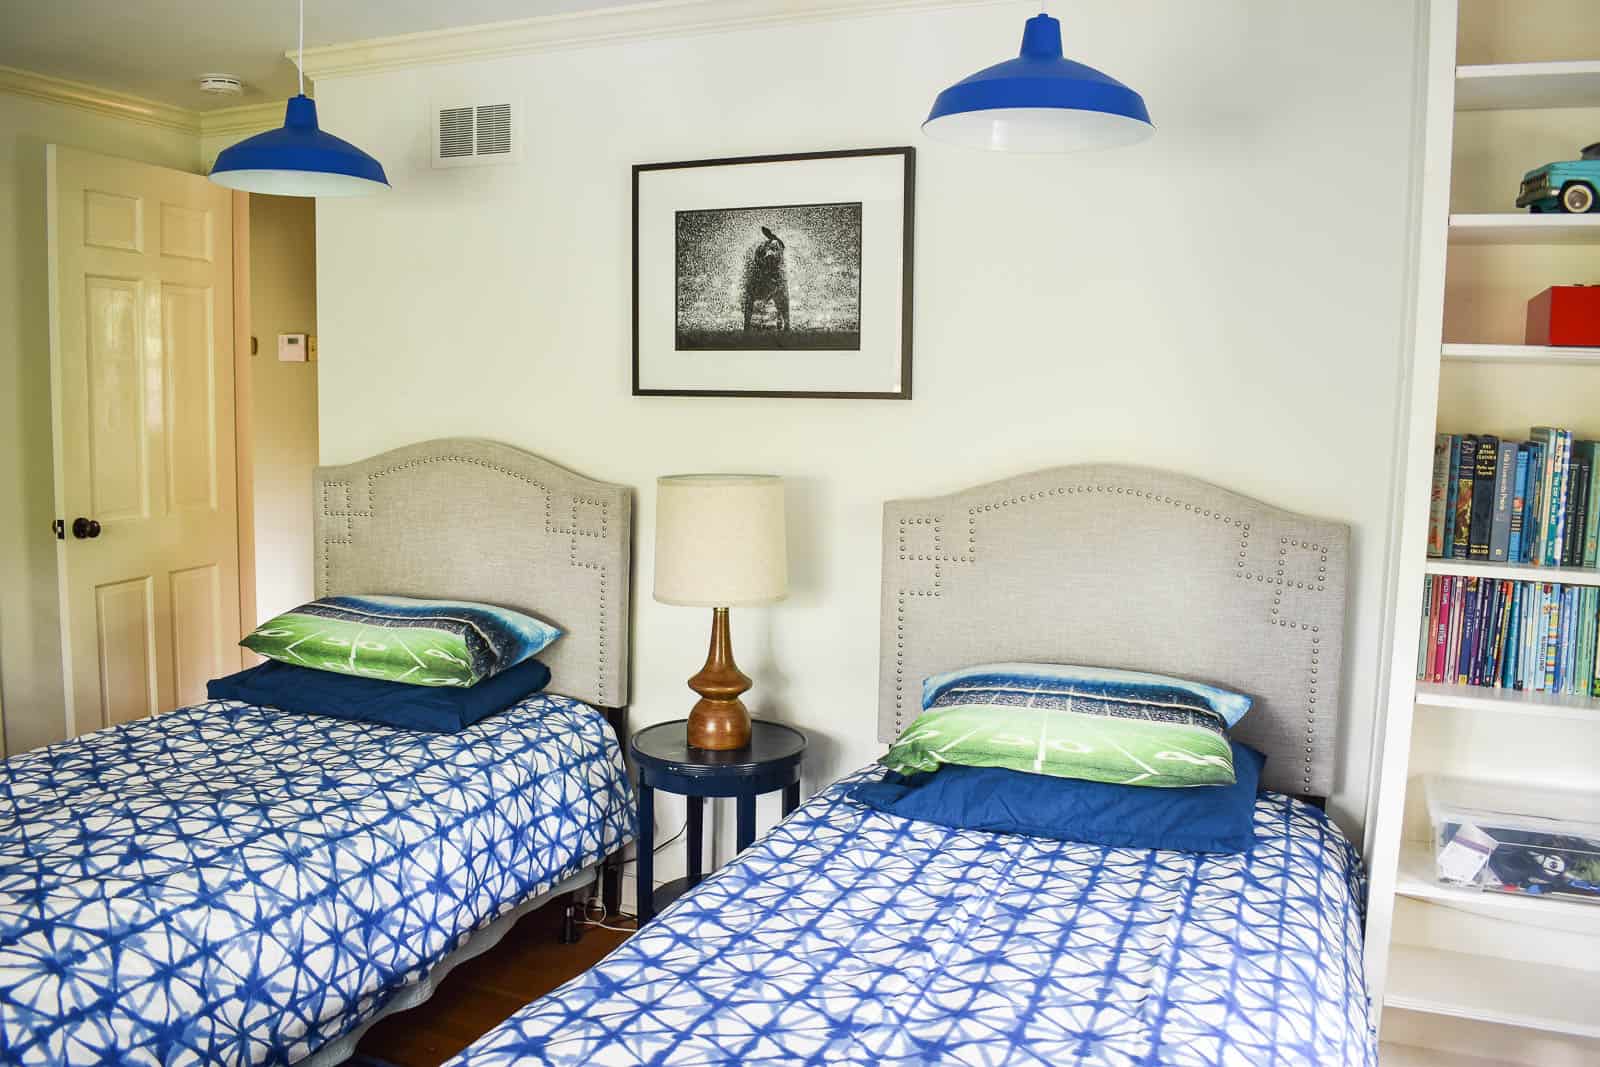
Credits: Charlotte Smith / At Charlotte’s House
Two blue pendants help define separate sleeping spots in this shared bedroom. Their shades repeat the bedding color and sit above the upholstered headboards without using either side of the central table.
The creator fitted these pendants with battery LED puck lights, so the useful lesson is the combination of overhead placement and a self-contained light source.
Plan equal hanging heights and comfortable clearance before installing any hardware. Make sure each light can be accessed for battery changes and that the mounting is appropriate for its weight.
Separate controls can give each sleeper flexibility, depending on the lights selected. Keep the central lamp available for use if needed.
Repeating one shade color makes the pair feel coordinated rather than busy.
17. Frame a Bedroom Vanity With LED Bulbs
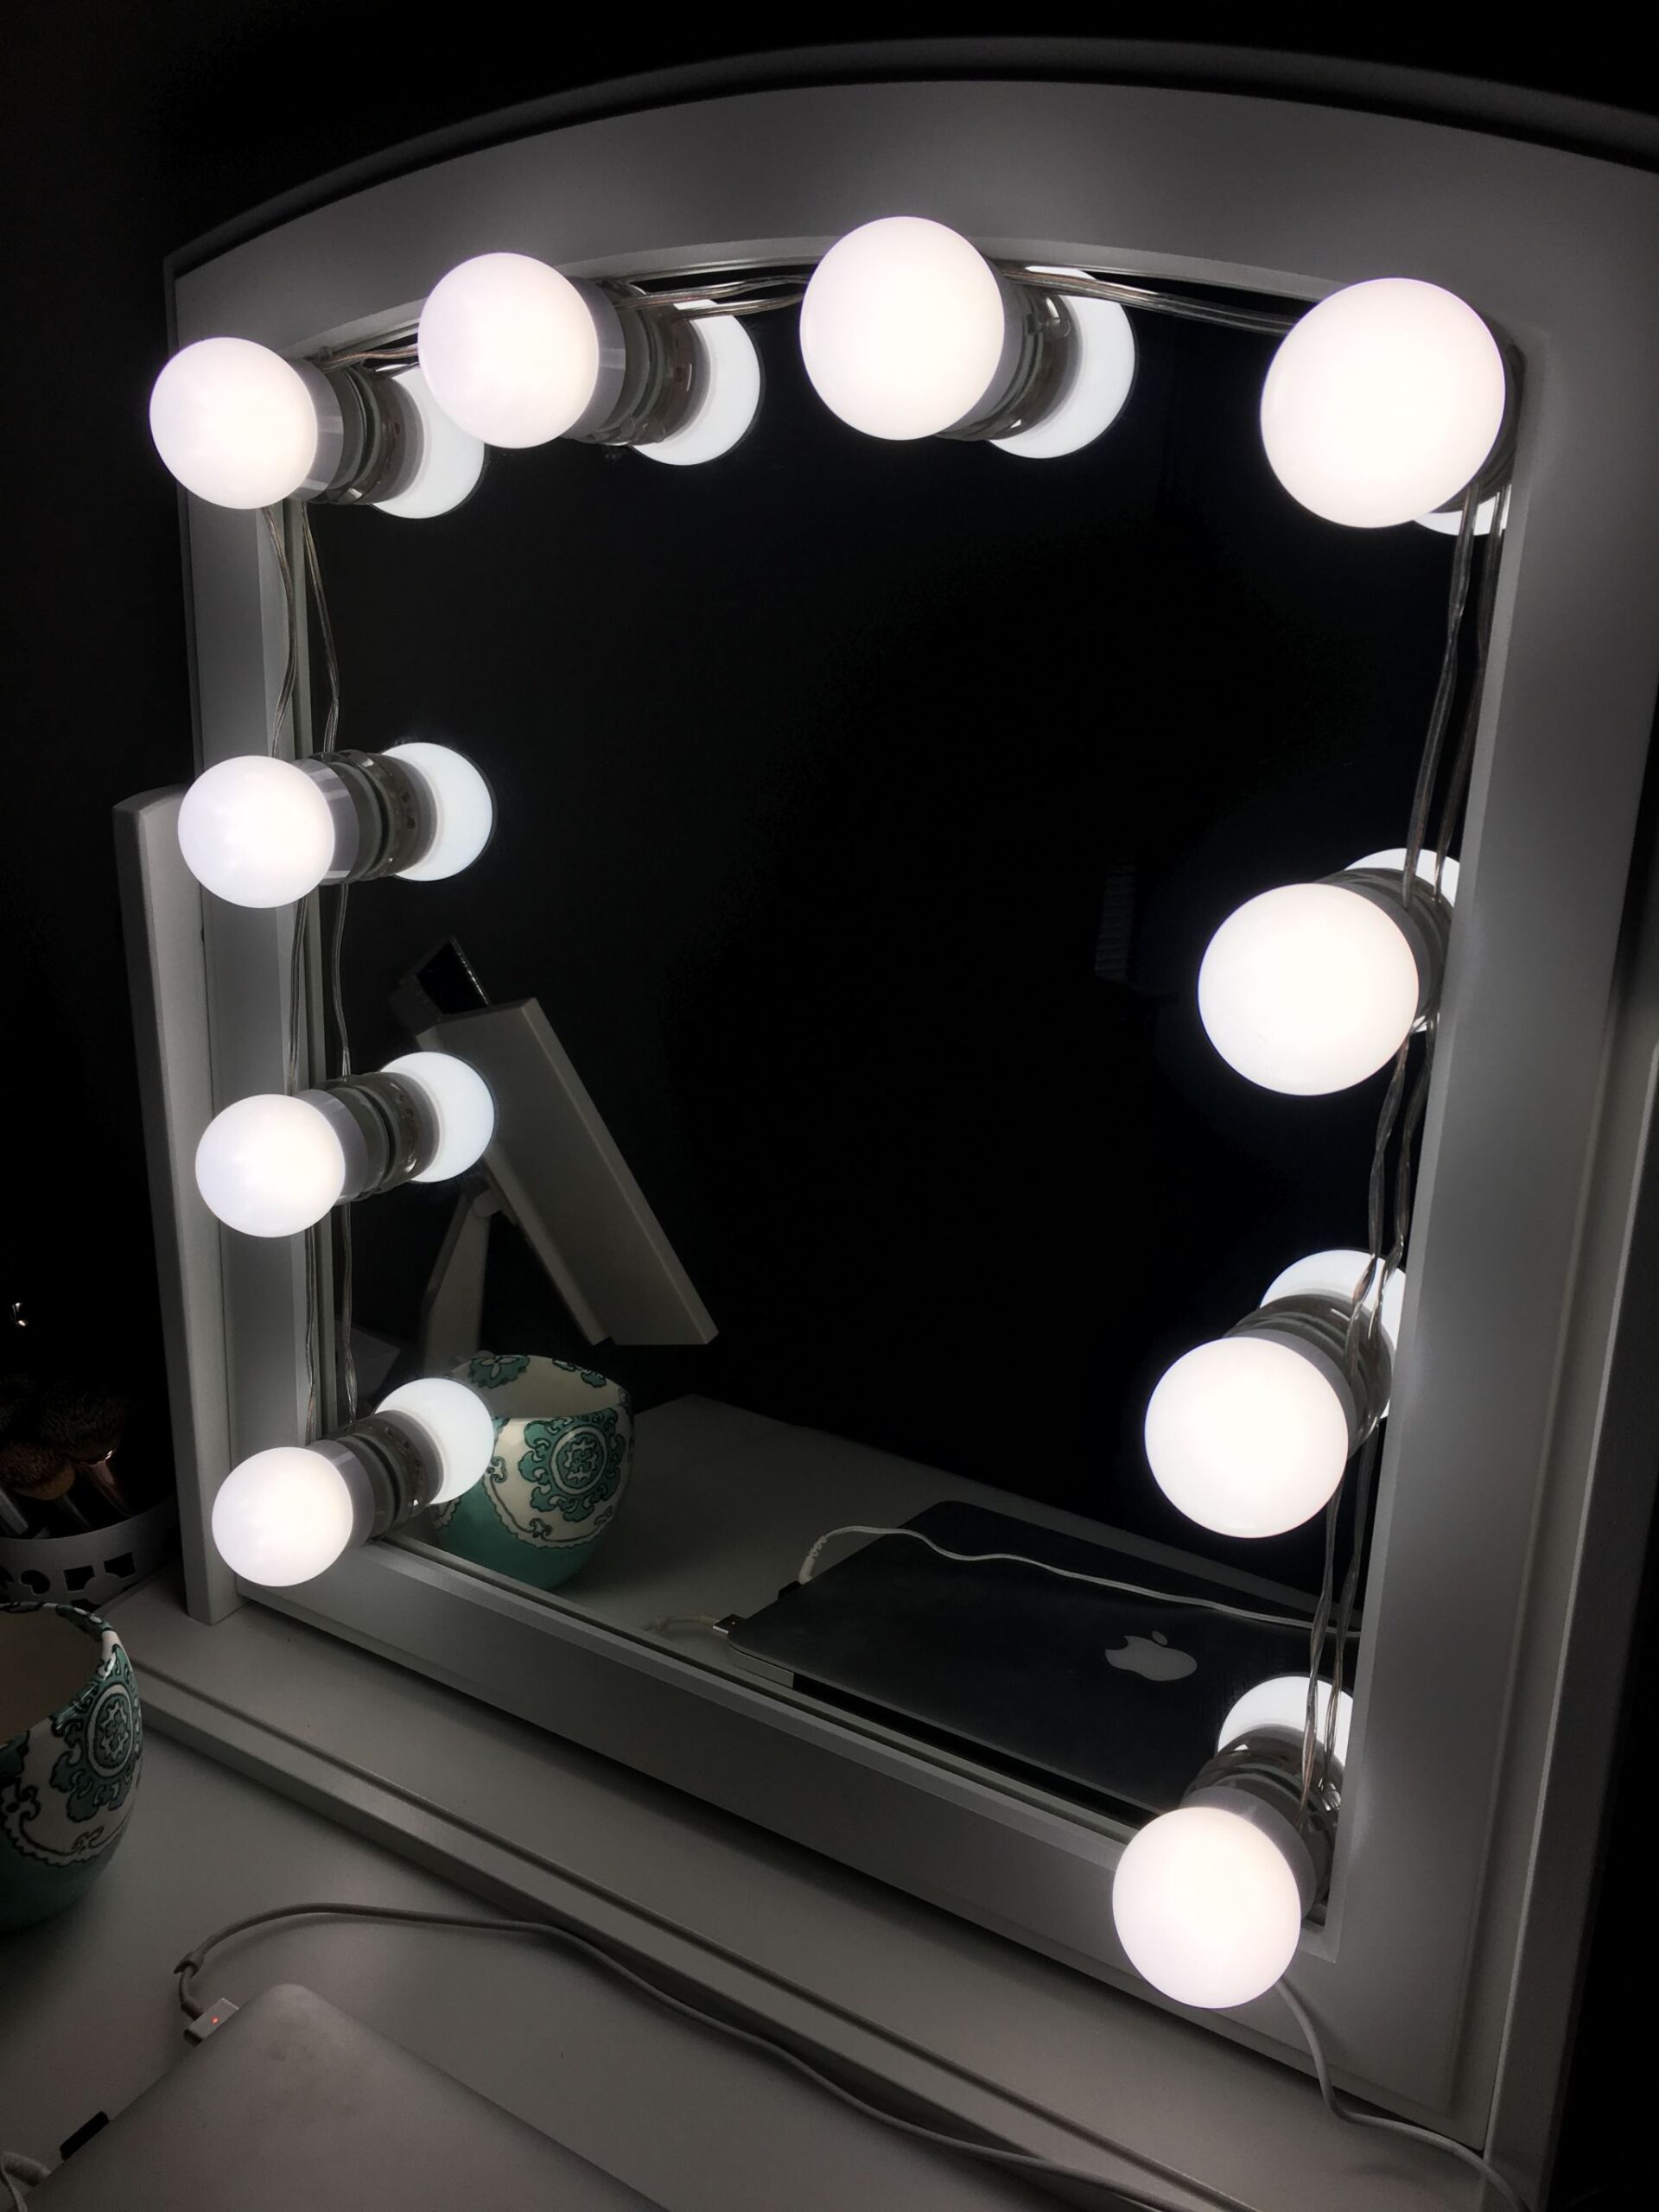
Credits: Girl Loves Gloss
A row of round LED bulbs surrounds this mirror, bringing light closer to the face instead of relying on a ceiling fixture behind the person using it.
The white frame and evenly spaced bulbs make the lighting feel like part of the vanity itself. This can help a dressing corner that sits away from the bedroom window.
Lay out the bulb positions before attaching them so both sides feel balanced and cords have a planned route. Check the kit's mounting requirements and make sure the mirror remains supported.
Adjustable brightness is useful for switching between grooming and a softer background glow. Keep the surface below organized so the additional wiring does not compete with cosmetics, devices, and other daily essentials.
18. Light Each Bedroom Closet From Above
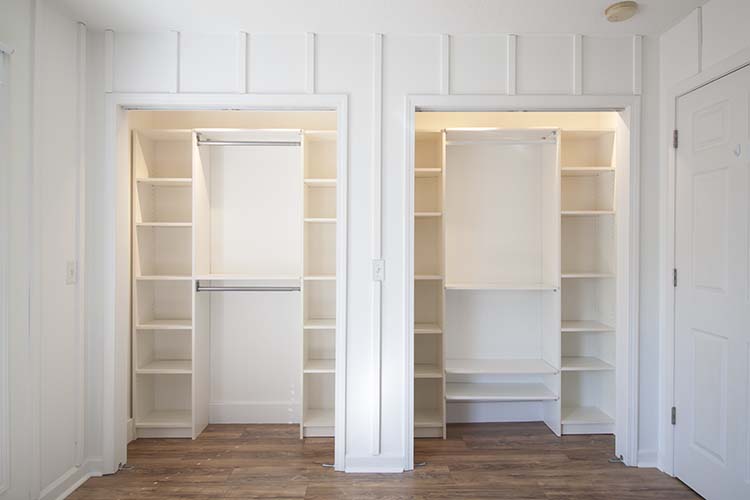
Credits: Southern Revivals
Matching ceiling lights brighten the two open closets in this bedroom, making their white shelves and hanging areas easier to distinguish.
The light stays within each opening, so the storage receives its own layer instead of depending entirely on the room's fixture. This is especially helpful when a tall shelf or door frame casts a shadow into the closet.
Plan illumination alongside the storage layout, looking for places where clothes or baskets could block the beam. Choose fixtures rated for closet use and follow all required clearances from stored items.
Have any permanent wiring handled appropriately. A consistent light color makes the pair look unified.
The shelves in this photograph show how evenly the light reaches through the upper compartments.
19. Put LED Bars Above and Below a Closet Shelf
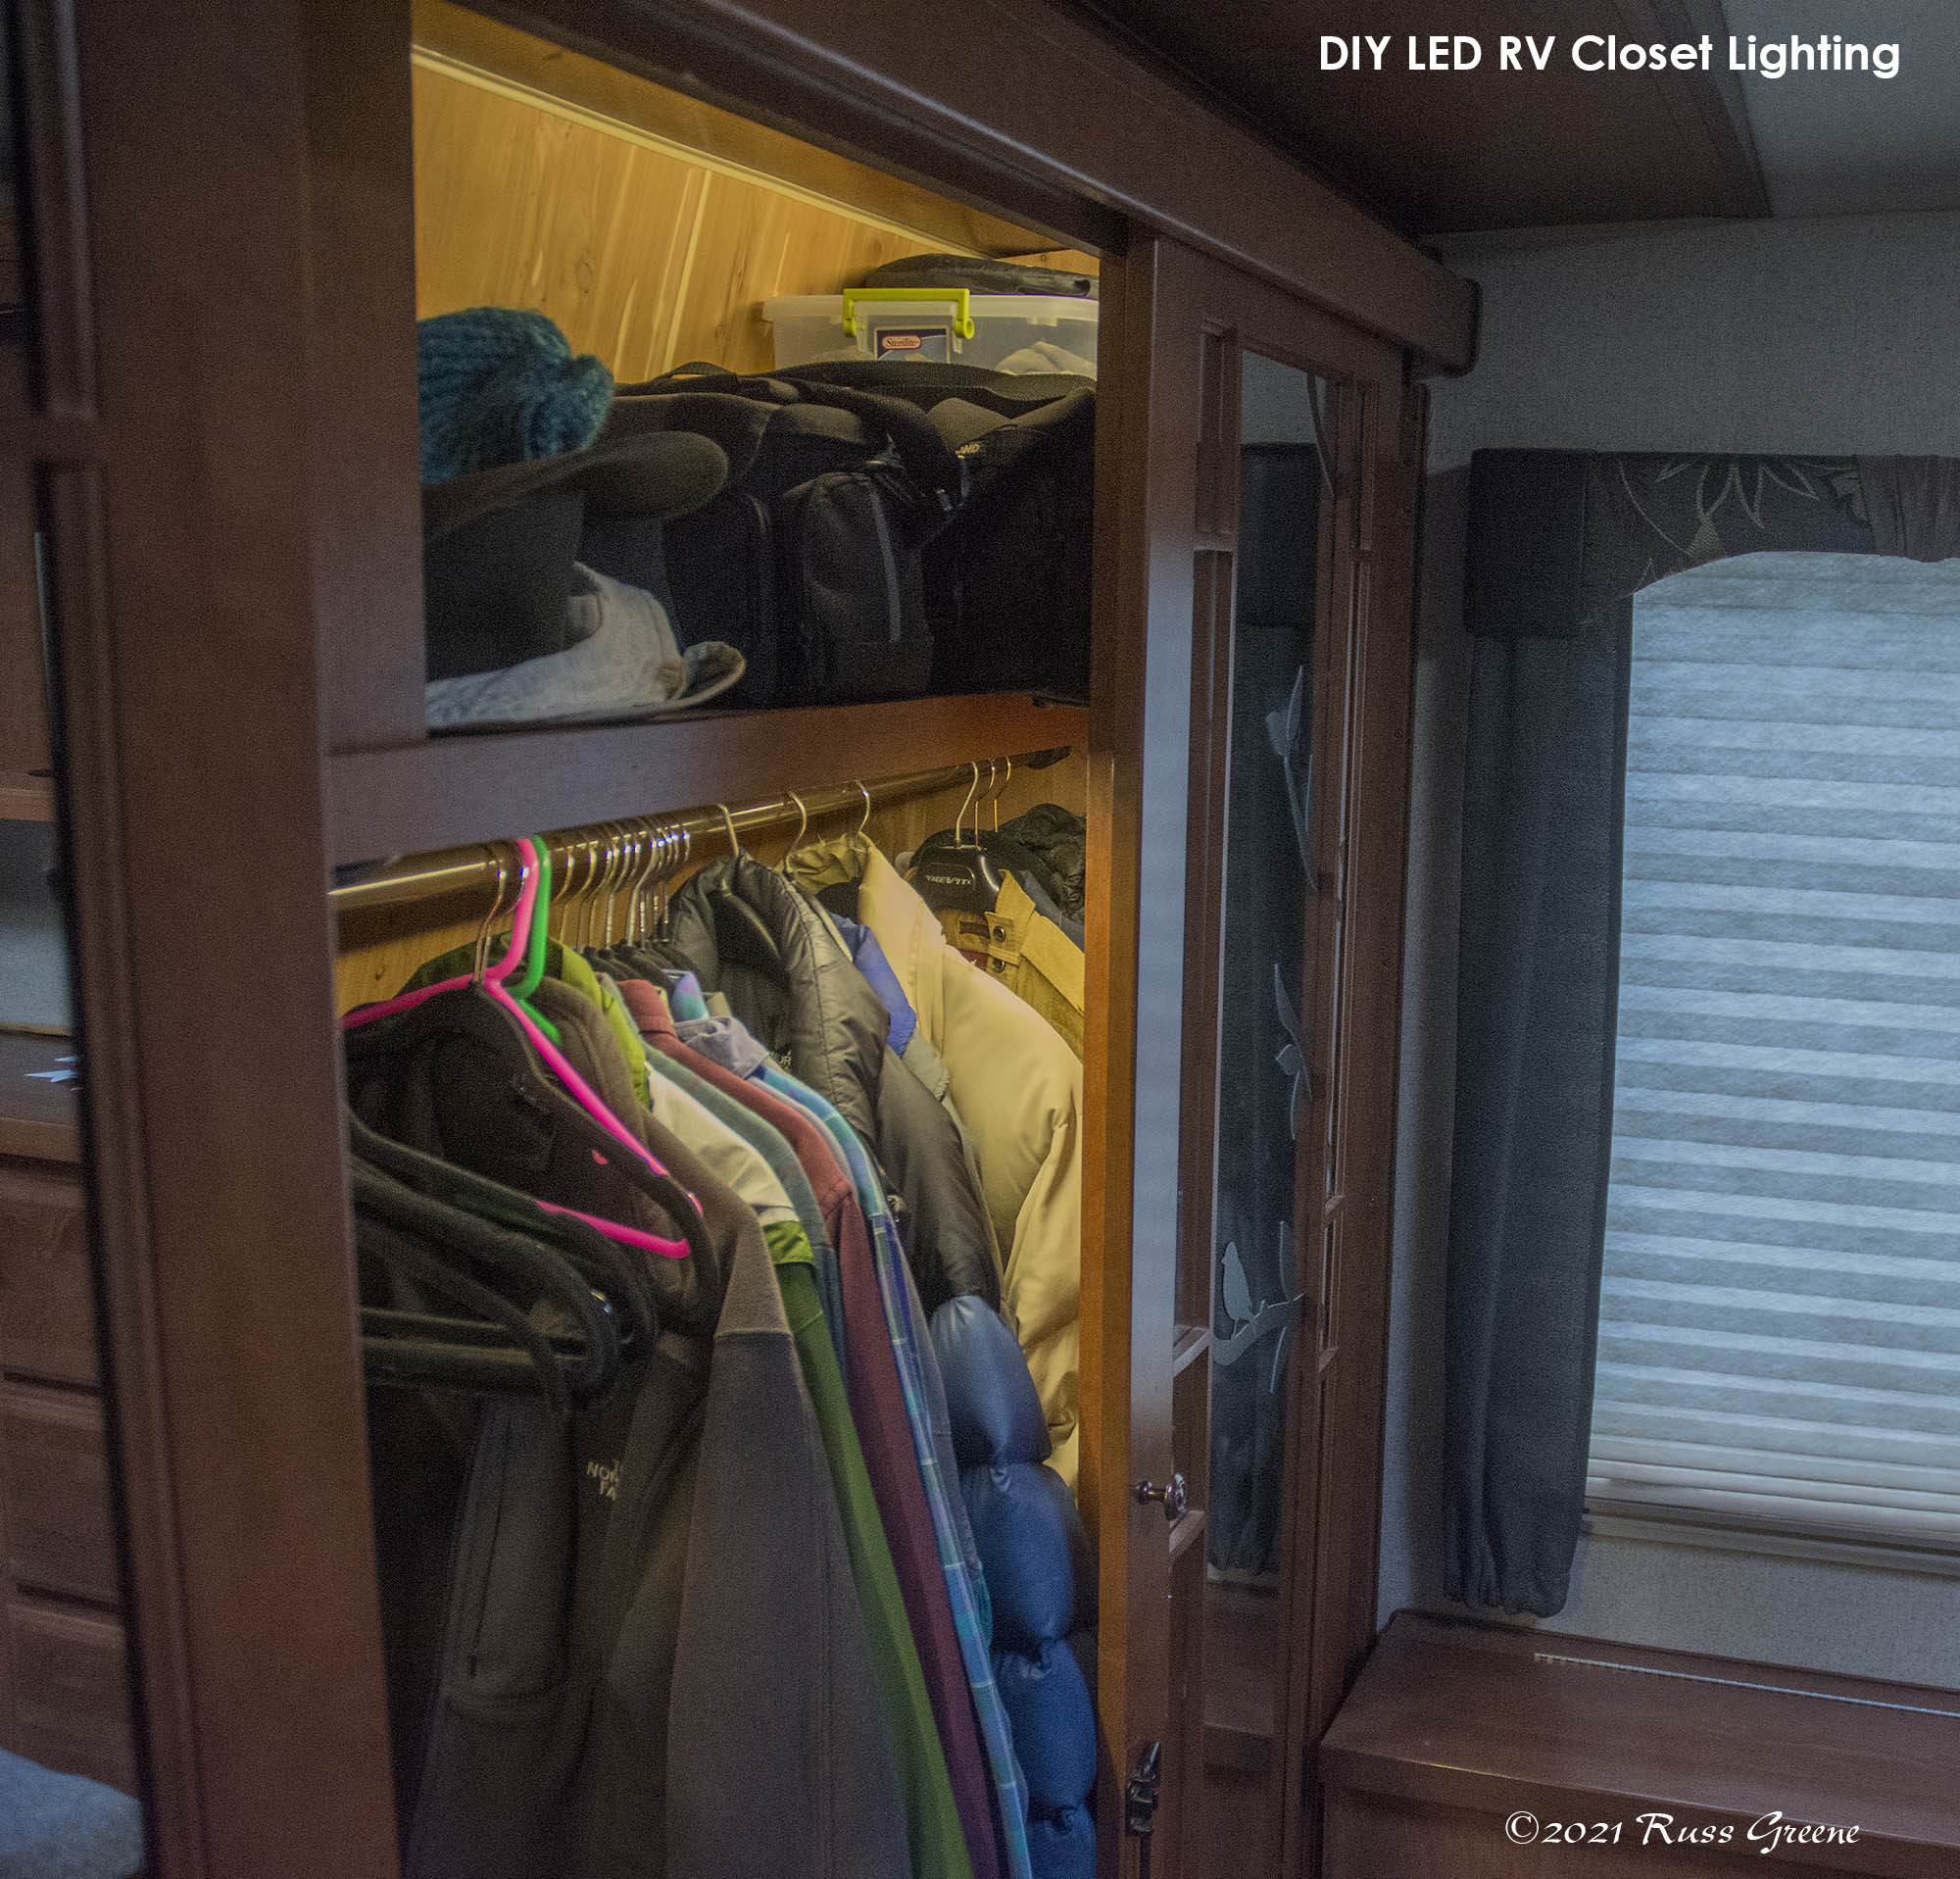
Credits: Russ Greene / Russ on the Road
Light reaches both the upper shelf and the hanging clothes in this bedroom closet. Separate LED bars keep the shelf from blocking illumination to the rail below, a useful improvement when one ceiling light leaves the lower compartment dark.
The warm wood makes the result feel integrated with the cabinetry rather than like an exposed utility installation. Plan the lighting around what you store, including the height of folded items and the space needed above hangers.
Use suitable channels and covers where the system requires them, and protect cables from sliding doors. The creator's installation also shows the value of keeping the sources near the front edge.
That placement directs light into the storage while making the bars less prominent.
20. Plan Reachable Controls Behind the Headboard
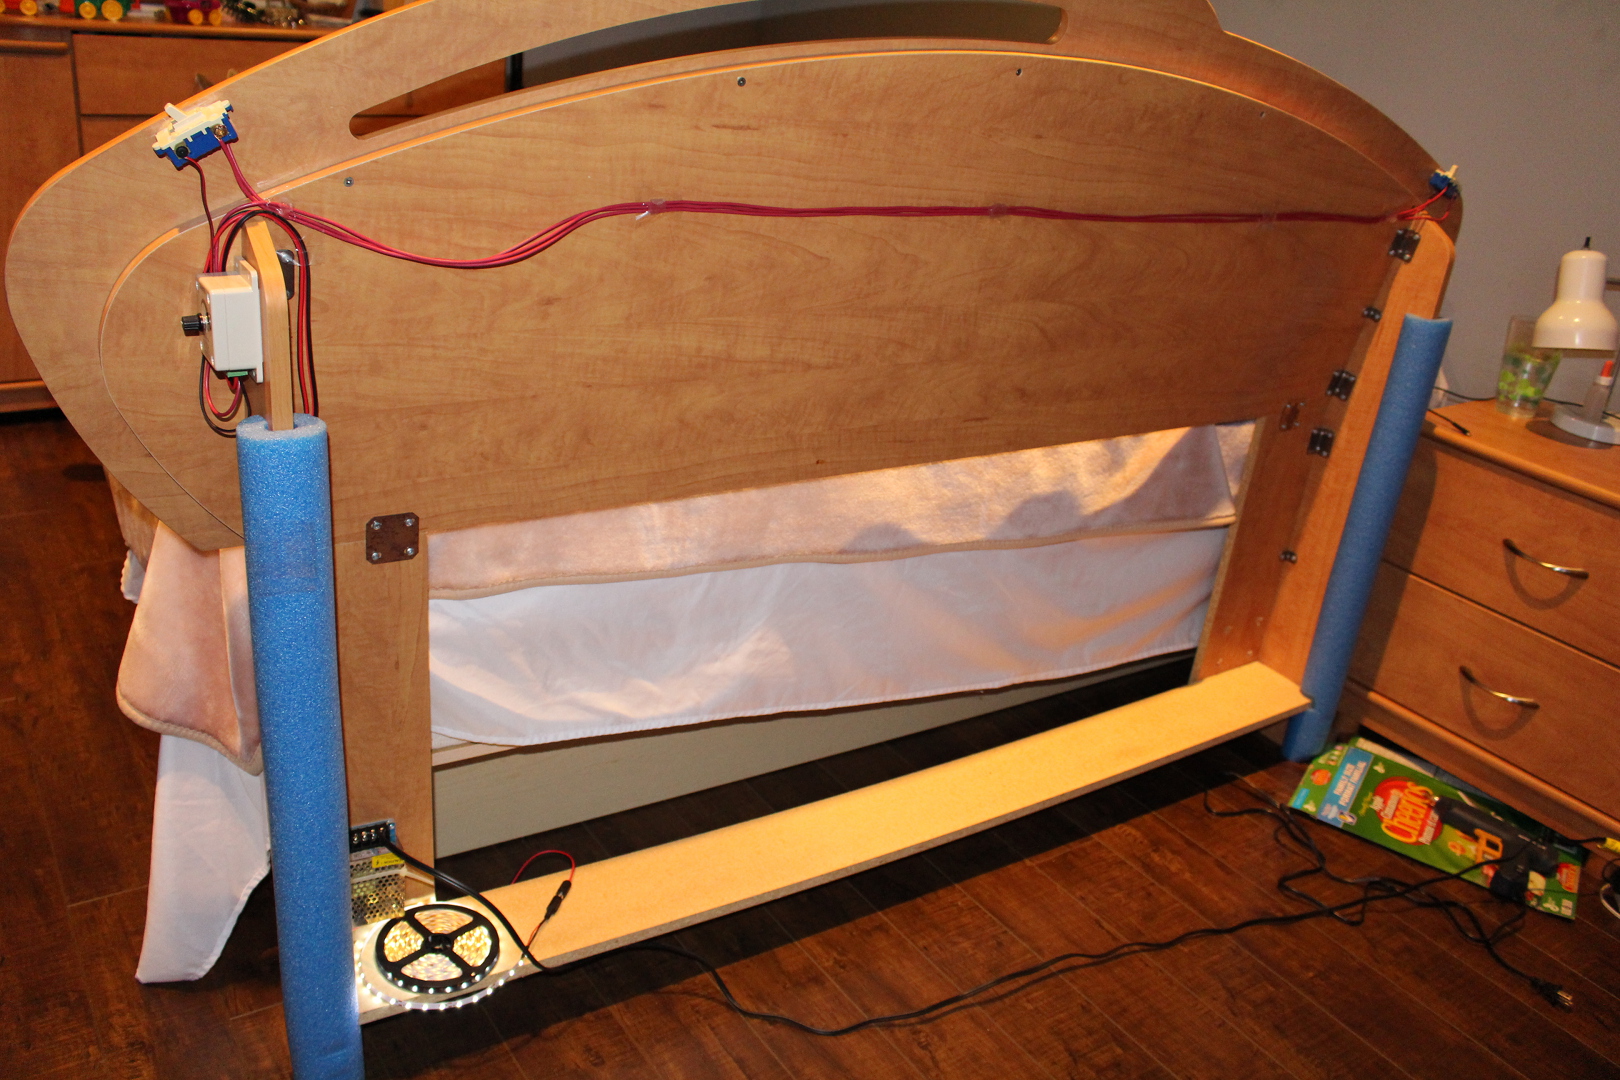
Credits: end2end zone
The back of this headboard reveals a detail that finished room photographs often hide: the lighting controls and their cable route. A dimmer box and switches are positioned around the wooden frame while the LED strip is being tested.
The useful idea is to decide how you will operate the light before completing the installation. A beautiful glow becomes inconvenient if every adjustment requires moving the bed.
Choose a compatible system with controls you can reach safely and comfortably. Keep components accessible for maintenance, protect cables from pressure points, and follow the manufacturer's mounting requirements.
This process photograph is a planning reference rather than an electrical diagram. The finished bedroom should conceal the hardware while leaving its everyday operation straightforward.